Roses are considered one of nature’s most beautiful flowers, and they come as perfect decoration on many occasions thanks to their simple yet elegant looks.
Fabric roses look amazing as a dining table decoration, on your bedsheets, and you can also put them on a dress or scarf to make it look more glamorous.
Fabric rosebuds may seem difficult to make, but in reality, you only need a few minutes per piece.
What Materials Do I Need to Make Fabric Rosebuds?
What I love about these is that you can use any type of fabric you like to make a rosebud. Muslin, satin, cotton, yarn, ribbon, leather, chenille, silk, polyester… You can even use wool, nets, or maline, because regardless of how slippery, thick, or rigid the material, the nature of the pattern will keep everything together.
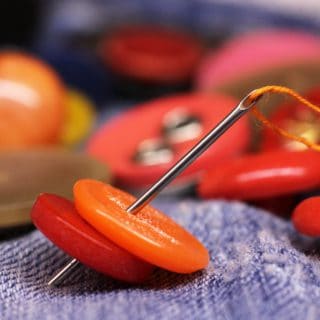
The basic materials for making fabric rosebuds are:
- Fabric;
- Needle;
- Thread;
- Ribbon;
- Glue;
- Scissors;
- Beads, pearls, glitter, artificial stamens – optional.
However, different types of fabric roses may require slightly different equipment, but if that’s the case, I’ll point it out as we go.
How to Use Fabric Roses
As stated above, fabric roses are an excellent decoration for many different purposes. You can use them to:
- Enrich your outfit;
- Make jewelry (necklace, bracelet, or if you make them small enough, even earrings);
- Make hair accessories;
- Hat decor;
- Wall decor or garland;
- Picture frame decor;
- As a brooch, etc.
Because there are so many different ways to make them, and you can use literally any type of fabric, you can make fabric rosebuds suitable for any occasion.
How to Make Fabric Rosebuds: Styles, Techniques, Fabrics
In the next few paragraphs, I’ll provide you with some simple tutorials on how to make fabric rosebuds from different materials using a variety of styles and techniques.
Let’s dig in.
Basic Rosebud
Basic rosebud is ideal for thinner fabrics such as silk, chiffon, crepe, net, or satin. Additional equipment you’ll need is a lighter or a candle.
- Take a piece of fabric and cut it into circles of uneven sizes, from small to bigger ones.
- The circles don’t need to be perfect. They should just follow some kind of roundish shape, however, if you see any angles around, just leave them.
- Take a small lighter or light up a candle and singe the edges of the circles. These are now flower petals.
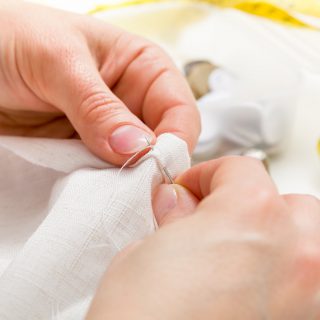
- Sew the petals together by picking one side of each circle to be the bottom side and then sticking the needle twice through the fabric to wrinkle it a bit. Start with the smaller petals and progress towards the bigger ones.
- If you wish to add anything like artificial stamens, beads, or pearls, do it when you’ve only started to sew.
The end product should very much resemble a real rose.
Flat Rose
The name says it all – this type of rose is very simple to make, all it takes is a few stitches and some decorating if you wish. However, you don’t need to form a real-life-looking rose.
- Once again, you can use any type of fabric, but in my opinion, it looks better on viscose and similar fabrics.
- Cut the cloth in circles in various sizes clearly differing from each other.
- Take three circles of different sizes and align them on top of each other from the biggest one to the smallest one.
- Stitch them together by sticking the needle into the middle.
- You can sew a pearl or bead in the middle.
- Use the lighter or candle to single the edges a bit so they don’t fray.
Gathered Rose
This type of fabric rose is maybe not as straightforward as the previous one to make, but it looks magnificent. It’s one of my personal favorites for its simplicity and abstract look. I like to use this one as a hair ornament, I often sew it onto a hairband and use it whenever I’m wearing my hair tied low.
Here’s what you need to do to make a gathered rose:
- Take a piece of fabric that’s 30” long and around 4” wide.
- Fold it along its longer side.
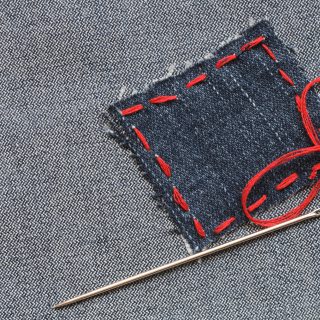
- Take a needle and thread and make gathering stitches on the edges of the fabric.
- Twist the fabric to fold achieve a rosebud shape.
Gathered Rose 2
Preferable fabrics for this type of gathered rose are thinner ones, such as chiffon, silk, linen, or crepe.
Here are the steps to making this magnificent fabric rosebud:
- Cut a piece of fabric 10” x 4”.
- Now cut that piece on the longer side obliquely so that one side is ½” wide and the other 2”.
- Make a gathering stitch on the longer side of the fabric. Pull it together and twirl.
- Swirl it to make a rose.
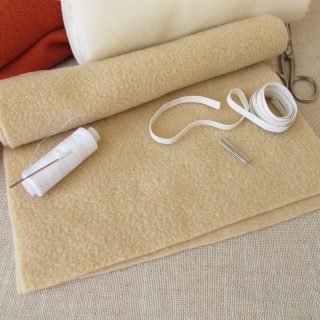
Felt Fabric Rose
Another super simple type of fabric rosebud is a felt fabric. You can make it out of scrapes if you have scrapes big enough to draw on them – at least 2” x 2”.
- Take a piece of felt and draw a rose (flower) pattern that goes like a spiral. You decide how to shape the petals, just make sure you can cut along the line with scissors.
- Make a gathering stitch starting from the base of the spiral and gather the fabric by “rolling” it into a rose shape.
- Attach additional pieces of fabric shaped like leaves if you like.
Felt rose is a great home decor ornament and it works well with winter clothes too. You can also use it as part of gift packing decoration.
Final Word
There are more complicated ways to make fabric rosebuds, but you will figure them out along the way once you master the easy ones described in the article.
For each type of rosebuds I’ve described, you can use any fabric you like. The fabrics given in the descriptions are just my recommendations.
If you like what you’ve read, visit our website for more sewing tutorials for beginners and useful sewing product reviews.