Learning how to finish stitches is an essential part of developing basic sewing skills. Lots of beginner-friendly and complex sewing projects require you to know how to end stitches regardless of whether you’re using a standard sewing machine, a serger/overlocker, or doing the stitching by hand. Read on to find out how to finish a stitch in each of these situations.
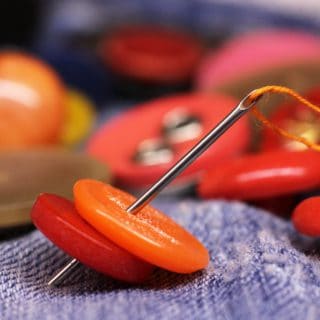
How to Finish a Stitch When Sewing by Hand
If you enjoy working on hand-sewing projects, there are a few things you need to keep in mind to be able to finish the stitching successfully.
Firstly, make sure to leave enough thread so you can tie off the stitch easily and have some excess thread after the process is completed. Depending on the length of the needle you’re using, leave between 4 and 6 inches of thread (or more if you think it’s necessary).
Secondly, bury or weave the thread through the fabric once you tie the knot. Don’t cut the thread before you do this. Burying or weaving your thread will increase the security of the stitching, but it’s totally optional.
Finally, practice tying knots in several different ways until you get the hang of it. Obviously, this applies to newbies.
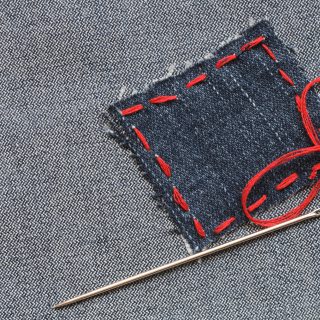
All right, it’s time to introduce you to the most commonly used method for ending a stitch when sewing by hand—loop through an existing stitch. Here are the step-by-step instructions:
Step #1: Turn the Fabric Wrong Side Out
Unless you want the knot you’ll make to be visible when you’re done, flipping the fabric over is a must. This will also allow you to see the length of the stitches you previously made. Don’t forget to leave around 5 or 6 inches of thread on your needle so you can execute the next steps with ease.
Step #2: Make a Loop
Slide the needle under the stitch closest to the thread and then pull it until it comes out the other side and a 1-inch-wide loop is formed. If you’ve left enough thread on your needle (as I instructed you above), this step will be an absolute breeze. In case you forgot to do this, you can tie more thread to the end of the thread you’re using and slide the needle onto the new, longer thread.
Step #3: Make a Knot
To make a knot, you need to insert the needle through the loop and pull it until the loop becomes a knot. Don’t push and pull too tightly to avoid breaking the thread.
Step #4: Double-Knot the Stitch
It’s always better to be safe than sorry, right? For optimal stitch security, bring the needle through the same stitch and make another loop, just like in step 2. Then, make another knot by inserting the needle through the loop and pulling it tightly. Since you’re doing this on the wrong side of the fabric, none of this will be visible when you turn the item right side out.
Step #5: Trim the Leftover Thread
Cut the leftover thread with a pair of sharp scissors. Trim close to the knots, but don’t worry if you leave a little thread behind. Finally, turn the piece right side out and feast your eyes on the simple beauty you’ve created.
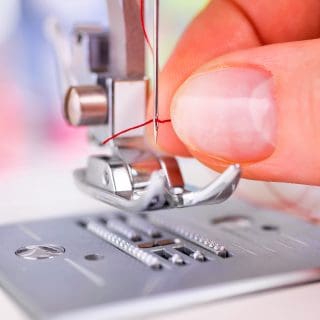
How to Finish a Stitch on a Sewing Machine
Ending stitches using a regular sewing machine is quite easy. If you’re fairly new to machine-stitching, spend some time practicing on a couple of scraps of fabric to understand how your sewing machine works. Once you feel ready to handle the machine, proceed to finish stitches with the backstitching method. Here are the steps you need to follow:
Step #1: Sew the Fabric Until You Almost Reach the End
Begin the process by sewing your fabric with a straight or zigzag stitch, but make sure to stop when you’re around ¾ inch from the edge.
Step #2: Press the Reverse Button
It’s now time to press the button for reverse stitching which is usually placed near the stitch dial. If you’re not sure whether you’ve found it, consult your owner’s manual. It’s also important to bear in mind that some sewing machine models come with a reverse button that needs to be held down during reverse stitching sessions. To avoid any complications or confusion, it’s best to familiarize yourself with your unit beforehand, using a scrap piece of fabric.
Step #3: Make Several Backstitches
Using the hand wheel or the foot pedal, sew 3 to 5 backstitches. This will result in more secure main stitches (the ones you made in step 1), because your sewing machine will work the backstitches directly over them. To further reduce the risk of undone stitches, consider making your backstitches shorter than your main stitches.
Step #4: Stitch to the End of the Fabric
To execute this step, you need to first switch back to forward stitching by releasing the reverse button. Then, sew over the stitches you made in the previous step with a straight or zigzag stitch and continue sewing past them until you arrive at the edge of the fabric. This will result in 3 overlapping lines of thread that finish the stitch.
Step #5: Lift the Needle and Trim the Thread
To cut the thread, you first need to lift the needle using the hand wheel as well as raise the presser foot lever. This will allow you to remove your fabric from your sewing machine and then trim the thread close to the last stitch. If you have a fancy sewing machine with a built-in thread cutter, you just need to take the thread to the blade and clip it. That’s it—you’re done!
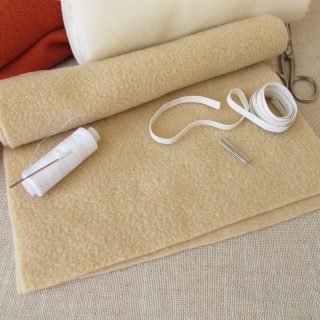
How to Finish a Stitch When Using a Serger/Overlocker
As you might already know, sergers are specialty sewing machines that are mainly used for creating professionally finished items, including swimwear, t-shirts, and home decor pieces. These machines are prized for their multi-functionality (they can trim seam allowances as you sew), high speeds, and durable stitches. Speaking of serged stitches, they can be finished in several different ways. Please bear in mind that sergers don’t backstitch.
Method 1: Tie the Thread in a Knot
Simply take the thread chain and tie it in a knot. To be able to execute this method successfully, make sure to leave 4-5 inches of thread chain on your serger and the fabric. Make the knot as close to the top of the fabric as possible with the help of a pin. Then, push the knot with your fingernails to tighten it. Next, trim the thread chain to about a sixteenth of an inch.
Method 2: Seal the Thread With a Stabilizer
The second method for securing serged seams involves the use of a stabilizer such as June Tailor’s Fray Block. The process is pretty straightforward: you need to cut the threads and seal them with a high-quality fabric glue to prevent the stitch from unraveling. Another option is to tuck the thread chain under the seam around 2 inches with the help of a large-eyed tapestry needle, cut the end, and apply the fray blocker. Once the sealant dries, you’ll be able to wash and wear the item in question.
Method 3: Secure the Thread Chain When You Start Serging
First, make sure there’s a little thread chain coming from your serger. Then, make a few stitches and stop. The needles need to be down at this point. Next, lift the presser foot and stretch out the threads by gently tugging on them. After that, pull the threads around the left side of the needles and under the presser foot. Next, sew about an inch while holding the thread chain forward, but do it after you lower the presser foot. Finally, move the threads towards the knife so it can chop them off and continue stitching.
Method 4: Secure the Thread Chain at the End of Your Serged Seam
Begin by serging to the end of the material and then go one stitch off the end. Next, lift the needles and the presser foot and then loosen the threads by gently pulling them forward above the needles. It’s now time to pull back the fabric and turn it wrong side out. To prepare for the most important part of the process, bring the fabric to the front as if you are at the beginning of the stitch. Then, place the fabric under the presser foot and sew over the stitch for around an inch. To keep the stitches from getting chopped off by the knife, move the fabric a bit to the left.
Once you sew that one inch, stop and lift the needles. The next thing you need to do is loosen the threads and move the material to the left so you can sew a chain to end the stitch. Finally, complete the work by cutting the chain. Congrats, you did it!
Final Words
Ending stitches is a small but crucial part of sewing. Depending on your practices and personal preferences, familiarize yourself with the specifics of one or more of the methods mentioned above and test your understanding before taking on a serious sewing project. Good luck!
Last update on 2024-04-28 / Affiliate links / Images from Amazon Product Advertising API