Just as you might have purchased an oversized pair of pants, your wardrobe might be housing a couple of shirts and t-shirts that you never wear because they look like undersized dresses when worn. If that particular brand of fashion doesn’t appeal to you, you might want to take some action by learning how to hem a shirt and how to hem sleeves. That way, you can save the money you’d eventually spend on a new shirt.
There is also the chance that a member of the family might turn out to be the incredible shrinking man overnight. Although the garments the incredible shrinking man wears at the moment of shrinking theoretically shrink as well, that’s probably not going to be sustainable in the long run because they are going to get very dirty and it will only be a matter of time before he becomes an… incredibly stinking man.
In this post, I will walk you through the steps of how to hem a shirt, a t-shirt, and sleeves, and how to keep up with the demands of having a literally shrinking man around.
How to Hem a T-Shirt
Step 1: Put the T-Shirt On
The first step of any hemming process is wearing the item to be hemmed and stepping in front of a mirror, since you want to see how much you have to cut off. It’s better to do that with the shirt inside out, because you’ll be able to mark the line of the new hem on the inside.
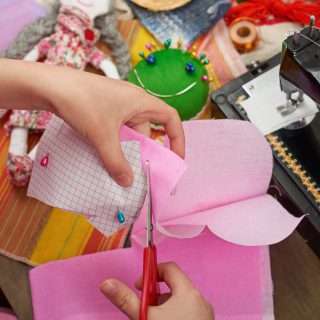
Step 2: Cut the Extra Length
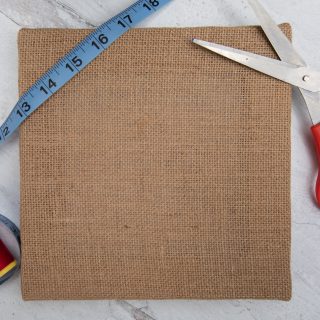
Draw a line at least half an inch below from where you want the new hem to be and cut it all the way around. If you don’t have enough self-confidence in your cutting abilities, place the shirt on a table, put the edge of a ruler on the line and cut it with the help of that. Also, make sure that the line is in equal distance to the edge all the way around the shirt, so you don’t end up with an angled hem after you are done (come to think of it, it might not be so bad from an aesthetic point of view, but that’s just me).
Step 3: Fold, Press, and Secure the Hem
After you successfully cut the hem and put your scissors into a place where no kid can reach them, fold the hem in a way that the mark of where you want the new hem becomes the bottom of the shirt. If your cutting wasn’t perfectly straight, this is the time that you can fix it, as you can hide your mistake inside the shirt. Make sure that it’s all neat and tidy, and there are no parts longer or shorter than the others, and then, press it with an iron..
Now that you have folded and pressed it, you have to secure it in place with pins and needles to make the stitching process easier.
Step 4: Get to Stitching
No matter whether you are using a sewing machine or sewing by hand, the stitching process is quite identical and straightforward: stitch as close as possible to the raw edge of the new hem. If you are sewing by hand, make sure you are stitching in small intervals, because it’ll be sturdier that way.
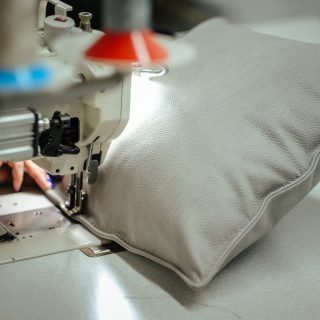
The best type of sewing machine for this work is a serger sewing machine, which can produce an overlocking stitch. Most even have an integrated knife, which will cut off the excess fabric.
Again, people will tell you that you should use a thread the same color as that of the shirt, but that’s not so much of a big deal if you ask me. Some things may as well be left to the aesthetic choices of the owner of the shirt.
You may opt for doing a few extra rounds of stitching because you want it to be as sturdy as possible. You can do it, but be aware that the stitch will show more if you do that, and the new hem will be less flexible (and possibly less comfortable) due to all the thread on its edge. Is it a price worth paying? I think yes, but I’d respect it too if you’re thinking otherwise.
Step 5: Tidy and Iron It
There might be a few places where the thread is left loose or you might have left a piece of fabric dangling while cutting it and decided to deal with it later on. Now is the time for handling those. Tidy it and then iron the entirety of the shirt because it might have become wrinkled during the process.
Remember that the shirt should have been inside out all through those steps. Having tidied and ironed it for the last time, though, you can finally turn it outside in.
Step 6: Put It On (Again)
The last step of any hemming process is wearing the item that’s been hemmed and stepping in front of a mirror since you want to see how better it looks and how great you look in your almost brand new t-shirt. Then you can silently nod your head to the person you’re seeing in the mirror in a way of congratulating them. Do they deserve it? Why, they absolutely do.
How to Hem a Buttoned-Up Shirt
The process of hemming a buttoned-up shirt is more or less similar to that of hemming a t-shirt, but there are a couple of points the two shirts differ, and therefore, as you can guess, the process of hemming them also differs on these points.
Step 1: Put the Shirt On
Once again, you have to put the oversized shirt on to see how oversized it really is, but this time, you don’t have to turn it inside out. After you decide how long you want it to be, put a mark half an inch below the targeted bottom line.
Step 2: Lay the Shirt, Draw a Line, and Cut
Unlike a t-shirt, you can actually lay a buttoned-up shirt on a table in its entirety (inside of it should be facing you), and it makes drawing a line on the mark you made in the first step easier and more accurate. However, the shirt you are working on might have curves on the sides. If you don’t want to change the style of the shirt as well, make sure that you don’t miss those curves.
Then draw another line half an inch below the one you have already drawn all along the bottom of the shirt and cut the shirt along those lines.
Step 3: Fold and Press the New Hem
Fold it in a way the first line will become the new edge, and press it with iron just as you’d do on a T-shirt.
Step 4: Get to Stitching
There is not much difference on this step except for the part where you should stitch the curves. Getting them right is a little easier when you are sewing by hand. It’s not that difficult on a sewing machine, either, but you should just be extra careful when you are closing in on the curves so that you do not miss them and keep on stitching in a straight line.
Step 5: Tidy and Iron It
Again, some unwanted loose parts might be present at the end of the stitching process, and you should get rid of them.
Step 6: Put It On (Again)
The most fun and rewarding step of any hemming process is the last one where you put the almost brand new shirt on and go look in a mirror. If you have successfully followed all the previous steps, you should be congratulating and even admiring yourself there.
How to Hem Sleeves
If you have successfully completed either of the hemming processes described above, there is a big chance that you have a pretty good idea about how to hem sleeves as well. However, I thought I should include this part at the end of my guide because I urged you so much to admire yourself in front of a mirror looking at the new hem you just sewed that you might have forgotten that your shirt had sleeves.
It wouldn’t be the end of the world – it would just be weird, that’s all, but still, you shouldn’t forget that and repeat all the six steps described under How to Hem a T-Shirt on the sleeves of the shirt as well. Of course, both of them!
Well, congratulations are in order now! You can go out and hear all the OMGs: “Where did you get that T-Shirt? OMG, is there still a brand that’s stitching their shirts so solidly anymore? Tell me!”
Don’t tell them.
Final Words
Let me reiterate the main idea so that the worries of those who are having second thoughts about learning how to sew or hem are put to rest: by being able to hem your own pants and shirts, not only your skills will be praised wherever you go or not only you will be able to find a solution for any problems in and around the wardrobes in your household, but also you’ll be able to save and even make money in the long run.
Moreover, if you have an incredible shrinking person in your family or social circle, they’ll be able to forget that they are literally shrinking because they’ll be too busy while you take their measurements in front of a mirror and while they are waiting for you to finish hemming their clothes as they wait in the guest room in their underwear. Isn’t such help to a fellow tormented human being worth the effort?