Even if you’re not professionally (or even amateur) into sewing, there are still many ways to make good use of a sewing machine.
For example, instead of bothering with hand sewing when you need to fix things, you can simply use the sewing machine and get it done faster.
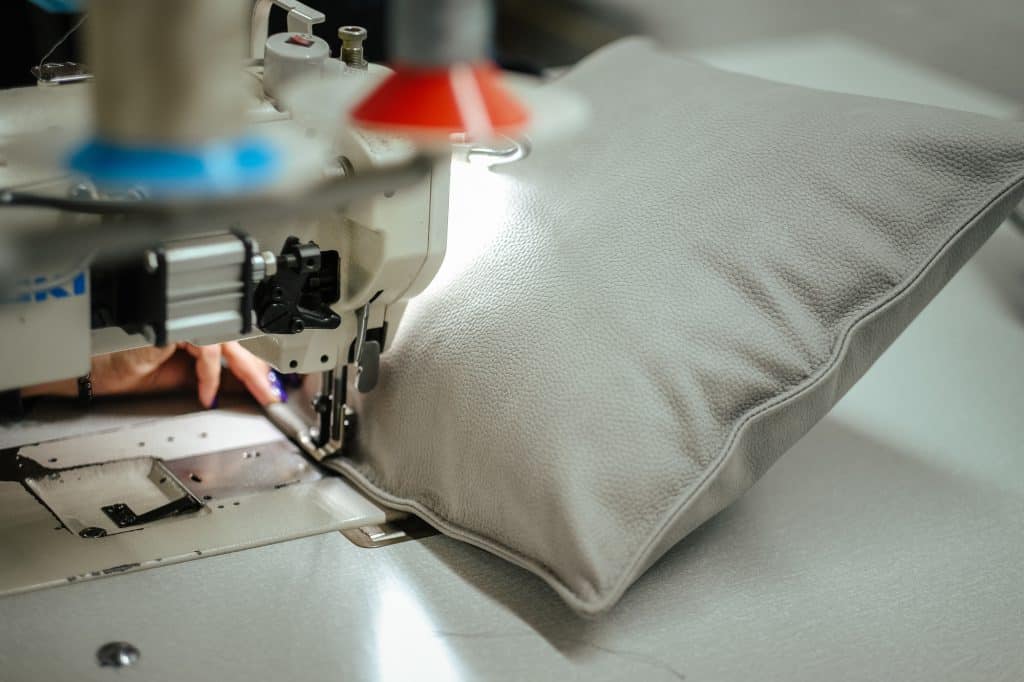
In this article, I am going to show you how to close a pillow with a sewing machine. The task sounds simple, but there is actually quite some work to do to complete this task.
You need at least elementary knowledge about operating a sewing machine, as well as some measuring and cutting skills.
But regardless of your sewing skill level – fear not dear reader, because if you follow this tutorial until the end, I guarantee you will learn how to close those pillows in no time!
How to Close a Pillow with a Sewing Machine – Step by Step Guide
To make this task more comprehensive and simple, we have divided the whole process into steps.
Here’s what you need to do to close the pillow with a sewing machine.
Step 1: Pick the Pillow Fabric
The first step which defines how you will complete this task is choosing the right kind of fabric for sewing your pillow. If you plan on putting your face on that pillow, make sure it’s something that won’t irritate the skin, meaning that silky materials and polyester should be off the table (plus, they are more difficult to machine sew because they glide). For this purpose, I would recommend natural materials such as linen and cotton.
Step 2: Cutting the Fabric
Now, it’s time to do some fabric cutting. For that, you’ll need a pair of fabric shears, which you can also purchase online while shopping for fabrics.
Take the fabric and cut two separate pieces of the same size and form. If you want to have a square pillow, use a divider to draw a perfect circle, or simply cut squares/rectangles.
It’s highly recommended to cut fabric with professional and sharp scissors, to avoid tearing the fabric edges.
Step 3: Sew the Fabric Pieces Together
Take the two pieces you just cut and place them onto each other by matching the outsides together. Make sure that the edges are precisely aligned.
Now, you need to put a seam end between the machine foot and the feed dogs.
You can use whichever stitch you like. Base your decision on the type of fabric that you’re sewing. For example, in my opinion, a cross-stitch looks amazing on cotton, but not as great on silk.
When you’re ready, press the foot, start your sewing machine, and sew the entire seam together on one side.
Step 4: Keep Sewing
You should do the same for the remaining three sides too. Use a dense stitch to close the fabrics tightly together. Lighter stitches can make the seam loose, which can lead to gradual loss of the pillow stuffing.
Also, you want to make sure that the endings of seams are super-securely stitched, so consider making double or triple stitching.
Also, you will also want to fill your pillow somehow, so make sure that you leave a small part open for the stuffing. Once the stuffing is in, you can stitch the opening as tightly as you did with the previous ones. But there are some steps to complete before that.
Step 5: Turn the Material Inside Out
Use the stuffing hole, or better say, the remaining open seam to flip the fabric inside out. As you do it, watch out for your seams, you don’t want to ruin them. It’s important that you complete this step slowly and properly so that you can stuff your pillow.
Step 6: Decorating the Pillow (Optional)
To be honest, this is my favorite part of sewing a pillow, but if you don’t want to, you don’t have to go through it.
Take some design templates and apply them on each outer side of the pillow fabric. Outline the design by marking it. Then, use the needle and hand sew those parts, or do it with a machine.
Step 7: Ironing
Use a hot iron to apply pressure on the outer sides of the pillow cover you sew. This is the only chance to complete this step, as you want to do it before stuffing the pillow.
If you’re more serious about your sewing projects, you may want to consider using a steam iron, as they heat very quickly, and are super-handy for all kinds of sewing projects, including those that are tiny.
Step 8: Stuffing the Pillow
When it comes to pillow stuffing you should first rethink whether you have any allergies. If not, then the next thing to take into consideration is the comfort level you’d like to achieve. If you want your pillow to be soft and comfortable, consider using artificial or even real feathers. These should last for a long time and not squander easily while providing you with ultimate comfort.
However, you can also try memory foam, which is considered to be very good for back and neck health, polyester fiber filler, or hypoallergenic cotton, if you are struggling with allergies.
Step 9: Close the Hole
Remember the hole? Finally, it’s time to close it, because your pillow is ready to shine on a couch or to take in your head for an afternoon or evening of total relaxation.
I would strongly recommend you to complete this final closing with a hand needle, as by now, and if you did everything right, your pillow should be way too big to be placed underneath a sewing machine feed dogs.
For this, all you need is a thin needle, as you want to make the smallest possible holes to keep your stuffing inside. By double stitching the seam densely, you will make it as strong as the machine would.
Now, you have a pillow that’s ready for use!
A Few Tips Before You Go…
- To keep your stitches healthy and strong, lay on your rectangular pillow in a horizontal, instead of vertical position. Don’t squeeze it or fold, because you will apply too much pressure on the seams and weaken them, but also tear the fabric.
- If your pillow is made of cotton (on the inside, or outside), you should leave it outside in the sun a few times per month. This way you will avoid lumps that cotton sometimes tends to make, which can be uncomfortable.
- Have your pillow cover a bit loose, as you don’t want the pillow inside to get dirty or too dusty.
- In case the pillow gets dirty or dusty, you can clean it with a piece of soft cloth or cotton and some detergent. First, soak the piece of fabric in some detergent and apply it to the cover. Once it’s gone, put the pillow in the sun and leave it there for a few hours.
Final Word
Although the process of closing your pillow sounds easy at first, you can see now that there are many steps to it that require your effort and attention.
Using a sewing machine for easy sewing tasks speeds up the process of finishing them, which can be particularly handy if you’re not a professional sewist, and just want to finish your project.
But also, if you are an experienced sewist, you can use this tutorial for closing a pillow with a sewing machine to make a good quality pillow real fast.


