If you’d like to avoid buying expensive clothes for Barbie dolls, you can save a dollar here and there by sewing your own.
This means not only having fun clothes for your favorite doll, but also keeping it in the latest fashion, or the fashion of your preference.
The advantages of sewing your own doll clothes are that you can always make custom pieces to give your doll a special look. Also, you don’t really need to be a highly-skilled sewist. Barbie clothes require some basic sewing skills, a few fabric scraps, and enthusiasm.
You can also use some sewing patterns for the Barbie clothes, and I will share a few from some of my favorite sewing bloggers.
However, just like there are certain peculiarities with sewing big-size projects (quilts, for example), there are also some things to consider when sewing miniatures.
Miniature Scale Sewing: Tips and Tricks
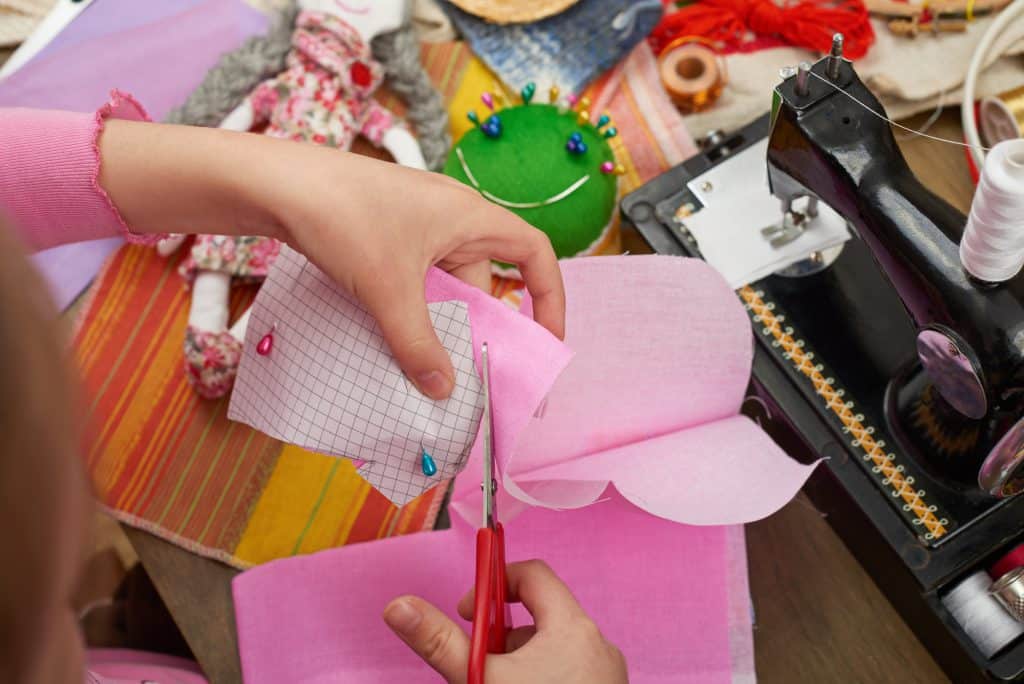
The first thing to consider when sewing small scale, are the materials you’ll use. For Barbie clothes, I would strongly recommend lightweight materials, as you don’t want to form a bulk.
Usually, fabric scraps are more than good enough for this kind of sewing project.
In my experience, the most difficult materials to work with are knit materials, while woven cotton is quite easy to handle. On the other hand, some stretch can do wonders when sewing miniature clothing, as it helps you attach the sleeves and decor, so maybe you’d want to consider woven fabrics for your sewing project.
Furthermore, although your method of choice may be hand sewing, I would still strongly recommend using a sewing machine, as it’s so much more practical.
In case you’re wondering which type of stitch best fits the miniature design, I would definitely say that it’s the zig-zag stitch. Especially when it comes to seam allowances. These should be particularly small, just like your designs: 0.15-0.2 inches tops. It can happen that you need more space, and that’s fine, but in general, be aware that everything you’re making is super-tiny, and at least 15 times smaller than people’s clothes, so make sure to keep your ratios.
Another thing with miniatures is that every mistake is very much visible. The sewing machine has a tendency to eat the materials at the seam beginnings, so if you’d like to prevent this, start sewing further away from the edges, a few inches inwards.
Sewing Barbie Clothes: the How-to Guide
Finally, let’s discuss details: how to sew Barbie clothes? In the following paragraphs, I will share some general tips, like how to sew a skirt or bodice for a Barbie doll, however, I’ll also redirect you to some very cool Barbie clothes sewing patterns you can use for your projects.
What Do I Need for Sewing Barbie Clothes?
Prepare, prepare, prepare everything on time. This is what we sewists usually can not stress enough to our less experienced colleagues. For Barbie clothes, you don’t need much, and usually nothing unusual:
- Fabric. Depending on what you’re sewing, you will usually need some fabric as the main fabric, and the other type of fabric for the lining. You can use scrap fabric or purchase new as I explained above.
- Needles and pins.
- Sewing machine.
- Sewing pattern (optional).
- Universal thread.
- Scissors.
- Ruler.
- Decor (tiny pom-poms, glitter, etc) – optional.
When it comes to sewing patterns, I gave some free recommendations in the paragraphs below. However, you can also purchase these patterns on Amazon, and they can be very cool and simple to use. Here are some recommendations.
Purchasing Sewing Patterns
- Simplicity Andrea Schewe sewing patterns for small-scale dolls.
- Simplicity S8866 patterns for Barbie doll clothing.
- Simplicity 4719 colorful doll clothes patterns.
No-Straps Bodice for Barbies
No sleeves, nicely lined, simple piece of clothing that combines well with other Barbie clothing pieces. Its front side is made of three panels. Here’s how to make it.
As usual, start by picking two fabrics, one as the main fabric, and the other one for the lining. This is how you manage to neatly finish the edges later.
Then, separately sew both layers and trim the seam allowance.
Press the pieces together. If needed, you can make a topstitch.
The next step is to pin both layers together on the right sides and make a stitch around, so there’s only one c-back seam left unsewn.
Use the scissors to trim any excess fabric and flip the piece so the right sides are out. Repeat the pressing.
Then, flip the open side on the inside and make a hand stitch to close the opening.
Finish the bodice with a Velcro closure.
Voila – you’re bodice is finished!
You can combine this one with the following Barbie clothing piece – the skirt.
But before we move to a new piece, here is one good Barbie bodice sewing pattern template from Pinterest, that can be of use if you’re more used to sewing with patterns.
Sewing Barbie Doll Skirts
Sewing skirts for Barbie dolls is one of my favorite parts of making a Barbie clothes project. Any kind of scrap fabric can work for a skirt project, so don’t throw away even the smallest fabric scraps: even if they’re somehow too small, you can sew them together, and then make a Barbie skirt.
The first step to making a Barbie skirt is to close the darts and make vertical seams everywhere, but leave the c-back open, just like you did when you were making the bodice.
When you’re done stitching, press the material and make a hem allowance. If you decide to use a skirt pattern, some of them can somewhat overlap with the c-back seam where the skirt remains open. The back seam should remain open until you attach the skirt to the bodice, in case you’re taking the sewing project in the direction of making a dress. If not, you can attach a simple waistband by sewing one end first (right sides should be together. The center of the waistband should match the front c-seam.
Don’t forget to leave some seam allowance, but trim any excess allowance fabric. Then, turn it on the inside and hand stitch. If you want, cover the back opening with Velcro, but if you don’t feel like bothering with it, you can make just a small stitch at the waist.
Use a c seam on the backside to close the skirt.
As promised, here are also some Barbie skirt sewing patterns I had a good experience with:
- Vintage 1960’s skirt sewing pattern template;
- Simple skirt for Barbie dolls sewing pattern template.
When you’re finished sewing the skirt, you can add some pompoms, strips, or glitter as decoration, according to your preference.
Flat Sleeves for the Bodice
When you’re sewing fashionable Barbie clothes, the bodice is something like the basic piece to which you can attach other pieces and turn them into a (t-)shirt, dress, jumpsuit, etc.
That’s why we started off with a sleeveless bodice, and then we slowly build onto that basis.
If you want to add sleeves to your bodice, you first need to close the bust darts (if there are any) and shoulder seams. If you are making a two-layer (main fabric + lining), pin together the layers and stitch along the backside c seams.
You might need to go through it a couple of times to make it symmetrical.
Then, if there’s any excess seam allowance, trim it together with the corners. You also need to make clips that will allow you to turn the lining inside out so it’s on the wrong side.
When you’ve completed that, press the material and don’t yet close the side seams. Attach the sleeves to the bodice first, and sew them while the bodice is still lying flat. Wait before closing the sleeve seams as well, as there is more work to be done before this step.
If the sleeves you are attaching require no hemming or gathers, use pins to attach them to the armholes. This requires enhanced focus, as you want to be very precise while aligning the notches to the shoulder seam. You can choose whether you want to leave the lining out, or treat it as one with the main layer.
For me personally, it’s much easier to sew when the bodice side is the top side. This process is the opposite of what you do when you’re sewing clothes for humans.
Also, it can be hard to attach the sleeves with a machine, as everything is so tiny. I usually hand sew them.
Here’s a useful video showing how to draft a bodice and sleeve sewing pattern for dolls. Earlier in the article, I shared a sleeveless bodice pattern made by another sewist, but I would also encourage you to make your own sewing patterns.
Sewing a Barbie Dress
Although you can use the bodice, skirt, and sleeves and simply connect them into a dress, you can also sew a dress in one piece.
Just like with human clothing, there are many possible dress designs, so I will share here my favorite one. Once you get a grasp of the first one, you’ll be able to make modifications according to your taste.
The first step is to cut one piece of fabric for the bodice, 6”x2.5” and one 5”x12” piece for the skirt.
You will also need two pieces of ribbon, 2.5” long if you want to put straps on the dress.
Then, prepare the Velcro if you want it, which will be 4” long and ¼” wide.
Then, sew a zig-zag or serge stitch on all edges of your fabric. Press the shorter sides with the iron and then press one long side of each piece.
Now, make a ⅛” seam around the iron-pressed sides. Roll the bodice piece around the Barbie and pin it snug. Also, pin in the front to mark where the darts will go.
Make the darts by sewing alongside the pins and make a couple of back stitches so they stay in place. Put the piece back on the Barbie and check whether the darts fit her well. If all is good, proceed with making a basic stitch along the upper side of the skirt. Pull the thread and gather the waist a bit.
Now fit the skirt to the bodice, attach it with pins, and sew alongside the pins. Leave a ½” seam allowance.
Flip over to the right side and iron press. Then, sew a top stitch alongside the seam with a ⅛” allowance.
Use the ribbon pieces to make straps by simply sewing them on the bodice piece. You can also follow the tutorial from above and add some sleeves to the dress.
When it comes to dresses, here are some of the best patterns I’ve used so far. By clicking on each of the links, you will be redirected to a page with a downloadable pdf file with a pattern template and instructions.
- Retro dress with ¾ sleeves.
- Dress and a matching braid.
- Double-breasted suit.
- A-line dress.
- Business dress/Sun-dress with a lace.
- Wedding dress with veil and gloves.
Sewing Barbie Pants
One of my favorite options for making Barbie doll pants/leggings, is out of old socks.
Depending on the sock pattern, this can work for both Ken and Barbie.
What you need here is a mid-calf sock and you’ll need to cut the foot piece off. So, if you have a pair of ripped socks, that would probably work best.
Then, flip the upper to the part wrong side out and cut across the middle up until some 1.5” before the top edge.
Now, on the incision that you just created sew another two seams using the zig-zag pattern.
Now, you have the pants legs. Flip them inside out and use a band to make an elastic waist.
The other option for making pants is using this amazing printable pattern. It comes with a detailed explanation of how to use it.
Conclusion
I am fully aware that I didn’t share all the possible clothing pieces you could sew for your Barbie doll, however, as you know yourself, it is not possible to cover all the choices for the sake of the length of the article.
However, I am convinced that you can use the existing examples and guides to make the most of your Barbie clothes sewing projects.
I would also encourage everyone to try to experiment a bit with the patterns. Make some changes according to your design ideas, decorate the outfits, make them asymmetric, longer, or shorter. This is the most important part of the process in my opinion – fun, and learning.
Last update on 2025-07-09 / Affiliate links / Images from Amazon Product Advertising API