Although it doesn’t seem like it, one of the more demanding tasks I’ve had to tackle was sewing patches. I know what you’re thinking (especially if you haven’t tried it): if I can’t sew a patch, what am I doing here sharing about sewing at all?
Well, let me tell you that sewing on a patch can be a daunting task if you don’t know what you are doing. The first time I had to stitch that badge for my daughter, I was amazed at just how peculiar this task is. This might be your experience as well, which is probably why you came here.
Don’t worry, though. Over the years, I have had so much experience with this, and I want to share it with you so that you don’t have to make the same mistakes that I did.
The problem with patches and appliques is that they are typically very hard, especially around the edges. This makes stitching them very difficult, not to mention the fraying that will develop if you don’t do it right.
Many of my friends have suggested attaching a patch with adhesive, but this can be a double-edged sword. On one hand, you don’t need to sew. On the other, laundering a shirt or pants with a glued-on patch will many times make it fall off, leaving nasty glue marks behind. You have been warned.
How to Sew a Patch
Alright, so, what’s the deal in sewing a patch on? There are two approaches: by hand or with your sewing machine. Each offers a particular advantage and disadvantage.
If you are here for a quick job, though, using your machine should be your first choice. True, it might not look as beautiful and you might not be as proud, but there would be rarely anyone to notice anyway.
How to Sew on a Patch by Hand
Let’s say you have your daughter’s Girl Scouts badge that you need to sew on a pocket by hand. And also, let’s say that the badge has a bound edge, which is much harder than your regular patch.
This is a situation where you need to use a whip stitch. Use this tool to put a zig-zag pattern along the edge, making it impossible to both fall out or fray. Otherwise, if you sew in a straight line along the edge, fraying is bound to happen. Your patch may also become ‘leafy’ and pull up from the pocket.
Sewing Patches on Hats
If you’re wondering how to sew a patch on a hat, it’s a similar endeavor. Take the hat and using a whip stitch, make zig-zag patterns along or over the edge. This also applies to sewing a patch on your pants’ pocket. Just make sure you pick a matching or contrasting thread, to make your work of art more noticeable.
Sewing Patches on Leather
Many people were also asking me about how to sew patches on leather.
This is something that I avoid doing unless I must. The reason is that sewing patches on leather will leave noticable holes in the material should you want to remove the patch at a later time.
The other difference between the methods I described above is that you’ll need a heavy-duty needle and a stronger polyester or nylon thread. But the stitching method is the same, even though your hands will tire a lot quicker.
Again, any time I’m asked how to sew patches on a leather vest, I describe how wary I am of doing this. You should be too.
How to Sew on a Patch with a Sewing Machine
Yeah, yeah, I get it—why use your hands when you have a sewing machine. In general, I concur (although I am inclined to argue that we lose some essence when not patching or touching our material with our hands).
The advantage of using a sewing machine is that you can imitate those tight commercially-made patches that are otherwise hard to do by hand. Another advantage is that you can potentially save a lot of time this way. A third advantage is that doing zig-zag patterns is so easy using a machine. Pick your pattern and off you go. A fourth advantage is that sewing on a bound edge is as easy as it can be. Seems like there are so many advantages to using a sewing machine.
And now, onto the how. How to sew on a patch with a sewing machine.
There are two positions here that you need to consider: sewing on the outside of a patch, and sewing a set-in patch.
When dealing with sewing on the outside of a patch, you basically want to achieve the same effect as with hand sewing. That’s how you’d prepare as well. After neatening the edges, place the patch over the hole. Pick your favorite sewing pattern and start sewing by the edge. I usually prefer the classic zig-zag stitch. Your sewing should be done within the minute.
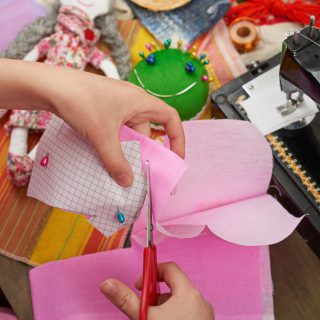
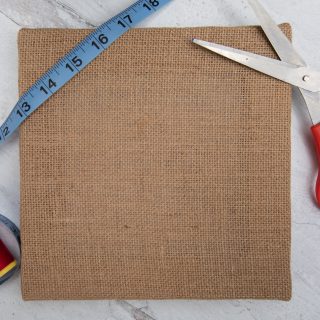
On the other hand, if you are about to sew a set-in patch, what you need to do first is cut out as straight of a shape (rectangle, square, circle or another) as you can muster. After this, make a cutout from your material that matches the hole. Place this cutout under the hole, and fasten it with some pins. Finally, sew it tight and enjoy your fancy-looking pants.
How to Attach Patches without Sewing
As I said above, it’s best to stitch a patch instead of avoiding sewing, because the patch will be much tighter and won’t leave residue glue blemishes.
However, I am fully aware that at times you just need to attach a patch without any sewing involved. You might be outside or away from your house & your sewing kit. Or you might just not care if the patch is glued or sewn.
How to Attach a Patch with no Sewing Involved
Fundamentally, there are two ways you can attach a patch without sewing: by glueing it, or by ironing it.
When talking about glueing a patch, the best approach would be to use an iron-on adhesive. You put, spread or spray the adhesive over the patch, and then use your iron to melt it. The glue will fall between cracks and attach the patch over the material. This is usually a hard-enough connection that won’t require too much maintenance.
Another way is if you bought from those patches that are already equipped with adhesive on the back. In this case you just need to pick your iron, press on the patch, and it will fasten relatively tightly.
If you are not careful, you may end up with unsightly adhesive blemishes that won’t go away, even if you put your clothes through a wash cycle or three. Sometimes these look so abhorrent that you might be tempted to throw away the item. You’ve been warned.
Best Fabric Glue for Patches
When I decide to glue a patch, virtually all times I use Heat-n-Bond’s products.
For example, the HeatnBond Lite Iron-On Adhesive works wonders. It is double sided, sewable, cuttable, and, of course, heat activated. It also works great with needles and pins, because it doesn’t gum them.
Sometimes when I need to upholster a piece or a table cover I’d use MAROBEE White Fusible Interfacing Ultra-Adhesive Bond Iron-On. What I’d do is cut a piece that fits the shape, and then sew it on the back of the material. Ironing it to activate it later on is a piece of cake.
To Conclude
Sewing on a patch shouldn’t be an Olympic sport. It should be an enjoyable and efficient exercise of your sewing skills, while also fixing and even beautifying your clothes.
Unfortunately, this is not always the case. I had to discover a lot of the advice that I shared above the hard way—by doing, making mistakes, and throwing clothes away. Luckily, you can skip months of this process by following my tips above.
Last update on 2025-07-02 / Affiliate links / Images from Amazon Product Advertising API