What’s the best age to start sewing? I started when I was twelve. My mom first taught me how to hand-sew. Then I watched her work on the machine.
She taught me that 90% of sewing is proper preparation and that I need to be patient and prepare everything before I put my hands on the machine. So at first, I would just help her out with preparation and then watch her sew on the machine. She would then explain to me how the machine works, which parts move, what their purpose is, and she would always explain this while she worked so that I could pick up on the process.
Very soon, I was ready to start stitching my first threads into some leftover fabrics, and before I knew it, I sewed my first dress for a doll!
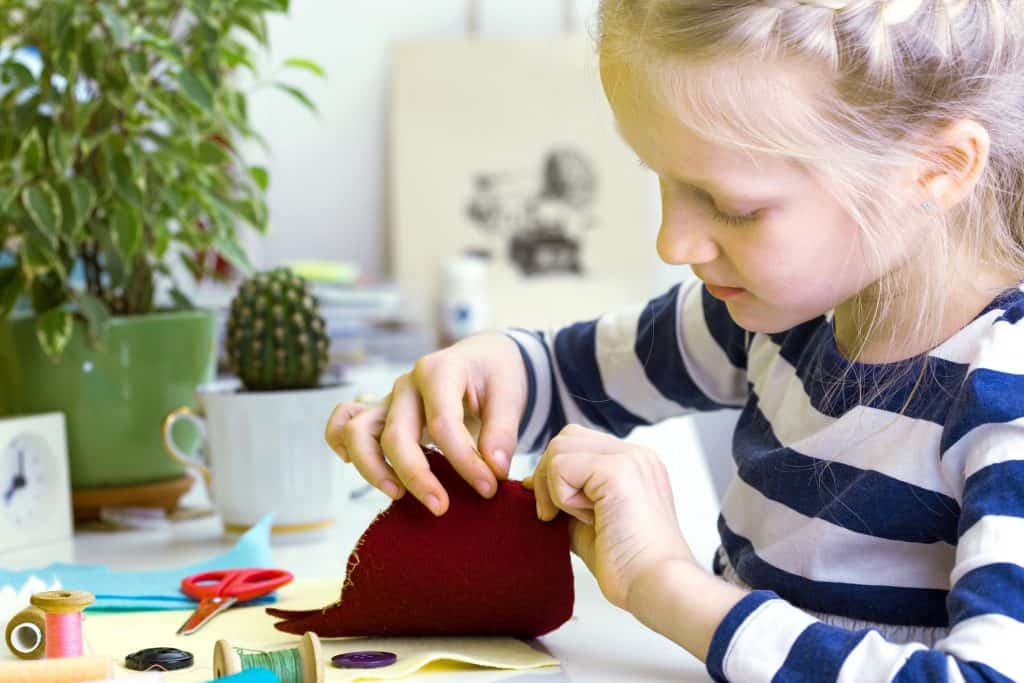
Sewing is an excellent activity for developing a child’s fine motor skills in a child, but also patience, persistence, and cognitive skills connected to spatial orientation and object manipulation.
Depending on the kids’ age and interests, there are different sewing projects they may find engaging: sewing teddy bears, dolls, doll clothes, or some fun decorations for their room.
What to Keep in Mind when Sewing with Kids
- Kids have a short attention span, especially the younger ones. Adjust the activities so they don’t get overwhelmed.
- This means they should either help you with the preparation or that you should prepare everything and then let them just sew.
- Explain to them how the machine works, name each part and explain its function in the simplest way possible.
- To teach them how the machine and the needlework, and how they have to move the fabric in different angles to stitch it, you can first print out a simple maze template, and then stitch the maze with the machine. Of course, the child will have to rotate the paper on which the maze is printed, and you can then analyze which stitches were good and which need improvement.
7 Best Sewing Projects for Kids (and Parents!)
Here’s my selection of the 7 best sewing projects for children that will teach them how to hold and manipulate the needle by hand, but also with a sewing machine. Some of them are super-simple, such as the button-sewing project, but others are rather complex and suitable for children that are a bit older, like 7+.
1. Buttons on Socks, T-shirts, Dolls… Everything!
For a child that is only starting with its first sewing project, learning how to sew a button on any type of fabric is an amazing first step.
You can perhaps buy some crazy buttons that they love and ask them to pick a pair of socks they’d like to decorate with buttons. Of course, they should also pick the buttons. It’s much easier to learn a new skill if you really like what you’re doing.
Buttons can be a fun sewing project for other decorative purposes too: you can use them to put eyes on dolls or to decorate dresses, T-shirts, or swimsuits.
2. Boo-Boo Bags
If you have any leftover fabrics that you don’t know what to do with, use them to make boo-boo bags with your child.
In case you’re not familiar with boo-boo bags, they are cute little bags filled with rice that you should keep in the freezer. Whenever your kid falls or scratches themself, you can put a boo-boo bag on the injured place to cool down the wound and lower the risk of bruises.
Here’s a fun pattern of a teddy bear you can use for a boo-boo bag, designed by Shiny Happy World.
Here’s how you make a boo-boo bag:
- Cut two pieces of each fabric in a 2:1 ratio;
- Place the two sides together and sew around a ¼ – inch seam along both short and long sides. Make sure to leave an opening on one short side.
- Cut the corners off and turn the fabric inside out.
- Take some rice, wheat, or other grain and fill the fabric.
- Hand-sew the opening.
- Keep it in the freezer.
3. Sleeping Bags for Dolls
Are your child’s dolls preparing to have a slumber party? The most important thing they need are sleeping bags, of course!
Similar to boo-boo bags, this simple project teaches a child how to put two pieces of fabric together, but now you also need to measure the size of the doll and plan your material accordingly.
Here’s what you need to do to make a doll sleeping bag:
- Download this doll bed pattern PDF.
- Cut two fabric pieces and place them so they mirror each other.
- Put the two interfaces together and sew around them, leaving a 1-inch opening.
- Cut the corners and flip the fabric inside out.
- Use some cotton stuffing to make a pillow on the longer side of the sleeping bag pattern.
- Make stitches below the pillow and across the longer side to keep the pillow stuffing inside the pillow.
- Fold the remaining flap over and stick it with a pin.
- Sew along the right side and the bottom.
- Turn inside out.
- Slumber party time!
4. Envelope Pouch
Pouches are always useful to have at home. Kids can use them to store small toys. They can use them as their first wallets for coins. I mean, you can always find lots of purposes for a pouch.
My favorite pouch is an envelope-type pouch, so now I’m going to teach you how to sew one.
- Place two squared pieces of the same fabric together with their front sides facing.
- Draw a square on the top piece of the fabric that will represent the sewing line.
- Sew around the square with a running stitch and leave a two-inch opening.
- Take a pair of scissors and trim around some ⅛ -inch from the sewing line.
- Flip inside out and iron.
- Fold three corners towards the center to form an envelope.
- Stitch together the meeting corners of the triangles.
- Fold the body in half and stick it with a Velcro dot.
- Take whichever tiny object you had planned on storing and put it in the pouch.
5. Tossing Bean Bag
Did you play with bean bags when you were a child?
I loved them even more than I loved playing with a ball. There are so many fun games to play with tossing bean bags, and since they’re quite small, they’re easy to carry around or travel with.
Making tossing bean bags is also an excellent sewing exercise for beginners, as they’re very easy to make, and you don’t need a machine – you can sew them by hand perfectly.
All you need is some scrap fabric, a needle, some thread, and a handful of beans.
Yes, you can use those from the shelf furthest back your kitchen cabinet, the one you forgot about 6 months ago, but make sure to keep your bags in a cool and dry place and away from pests if you want the bags to last. If you don’t want to use anything edible, which is sensible, you can also fill the bags with synthetic cornhole filling.
There are so many games you can play with a bean bag: throw and catch, balance the bag, toss, “bowling”, hot potato, juggling, hacky, etc.
Here’s how to sew a tossing bean bag:
- Cut the fabric in a square or rectangular shape double the desired size of your bean bag.
- The ideal size for a bean bag is the same as the hand that’s tossing it (so, your kid’s hand probably).
- Place the two pieces together, right sides overlooking each other, and fold them in half.
- Stitch around both sides, leaving one open.
- Leave a ½-inch opening.
- Trim the corners.
- Turn the fabric inside out and press the fabric on the opening inwards to make a ½-inch hem.
- Fill the bag.
- Pin close the opening for safety.
- Sew the opening shut.
- You’re ready to play!
6. Scrunchies
Useful, simple, and good-looking, scrunchies are the perfect beginner’s project for children. Unless you want a fancy scrunchie made of some specific material, you’re good to go with fabric scraps.
Scrunchies are not only useful for your own household (even if you don’t wear long hair that needs to be tied, there are still many ways to use a good scrunchie), they’re also really cool DIY gifts for friends.
- Take a long piece of fabric, fold it lengthwise, right sides facing each other.
- Sew along the long edge to make a tube and backstitch at the end.
- Turn the tube inside out.
- Feed the elastic through the tube and then sew the ends together. The easiest way to do this is to use a safety pin.
- Fold the unsewn edges and stitch them together.
- Puff your scrunchie and you’re good to go!
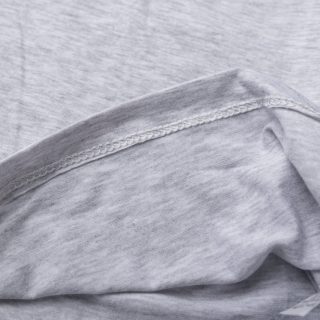
7. T-shirt to Skirt
One of the things I love the most about sewing is reusing. No senseless throwing and littering – there’s always a way to reuse a piece of textile.
Turning a T-shirt into a cute summer skirt is maybe the easiest project on my list.
All you need is an old T-shirt, a piece of elastic 1-inch wide, and a safety pin.
This project is an excellent exercise for young sewers to practice measuring and actual clothes-making.
Here’s what you need to do to turn an old T-shirt into perfect summerwear!
- Measure the person for whom you’re making the skirt from waist to knee.
- Decide at which part of the leg you want the skirt to end (knee, below the knee, above the knee…).
- To that measure, add another 1,5 inches.
- Layout the T-shirt and measure it from the bottom. Once you reach the number you just calculated, cut the T-shirt straight across.
- Fold the freshly cut edge 1.5 inches. As you fold, put pins.
- Now sew ¼ of an inch up from the raw edge of the folded fabric. Leave a 1-inch wide opening.
- Measure the waist and then subtract 1 inch. That’s the length of the waistband.
- Use a safety pin to put the waistband inside the folded fabric.
- Sew the end openings.
- That’s it, it’s ready to be worn!
A good thing about this skirt is that there are sooo many ways to touch them up further: you can add patchwork using other leftover materials, play with glitter, add other fabric decorations, etc.
Wrapping It Up
Well, that’s it: I hope that my selection of sewing projects for kids was also fun for you to try. Sewing is such a great way to bond with your child while doing something creative, useful, and fun.
If you’d like to find other simple sewing projects for beginners, hop on to our blog for more articles on the topic!