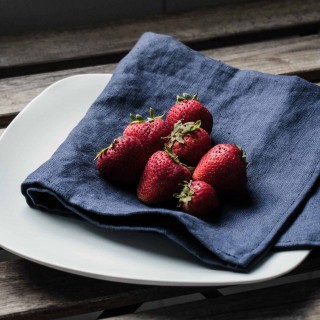
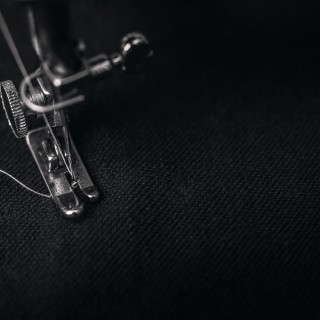
If you flip any hoodie, tracksuit, t-shirt, or even jeans, you will probably be able to see the well-known, artsy-looking type of stitch that holds the fabric fold on the edge.
Now, you may be wondering – how to make such a stitch? It seems so complex that it has to be hand-sewn! But that’s completely unrealistic. So, how does one make that beautiful stitching?
Well, the stitch in question is called “coverstitch”. That’s a professionally done hem with two stitched rows on the top, and on the other side, there is a stitch that resembles the serger stitch.
The good thing about a coverstitch is that it’s highly stretchable, and you can cover the raw edge of the fabric in a single pass. This makes it an excellent option for sportswear, sweatshirts, knitted fabrics, fleece, and lycra.
However, to sew a coverstitch, you need a particular type of machine. In this article, I will share everything I know about making a good coverstitch, and I will provide you with a comparison between a coverstitch machine, a serger, and a sewing machine.
The Coverstitch Machine
A coverstitch machine’s purpose is to add professionally done finishes on hems, especially when dealing with natural and knit fabrics.
A coverstitch machine provides us with stretchable, secure, and even seams that move together with the fabric. Similar to a serger, you can use a coverstitch to attach different things to your fabric, such as lace, elastics, or any other type of trim to any kind of garment.
You can also use a coverstich machine in a similar way you can use a serger, and that is to make some stunning, decorative effects for your topstitches.
The Serger
The serger, also known as the overlocker, is also used to make professional-looking finishes on a variety of sewing projects, such as sleeves, seams, hems, and many other items. It’s done by cutting seam allowances and then securing raw edges by encasing them. It’s one neat and smooth sewing operation.
Serger best works on knitted fabrics, but you can use it with other materials as well. The strong side is that it works on both light and heavyweight fabrics. There are different models of these machines, and some can make up to 1700 stitches in one minute and hold as many as eight thread spools. A typical serger usually has two needles.
The Sewing Machine
Finally, the sewing machine is the most well-known out of all of these, and most of you reading this article likely possess one, which is why I’ll be brief. These can vary in features a lot, in terms of how many stitches they can make, mechanical or digital, etc.
The most basic stitch you can make with a sewing machine is a straight stitch. In a straight stitch, one line goes along the top of the fabric piece, while the other runs along the bottom.
Another type of stitch most machines built after the 1950s can do is a zig-zag stitch, which is common in knit materials.
With a sewing machine, you can sew almost anything. However, there are different types of machines for heavy-duty fabrics and those intended to sew regular fabric types (cotton, linen, wool, etc). However, sewing with a sewing machine is not always the easiest way to sew something, so sometimes, you’ll want to use another type of tool to complete your sewing project.
To find out more about sewing machines, check out my sewing machine review page on my website.
As you can see from the description, the serger and the coverstitch machine serve a similar purpose, while the sewing machine is somewhat broader. However, it doesn’t necessarily cover all needs you might have as a professional sewist.
In the following paragraphs, I will:
- describe some key differences and similarities between a serger and a coverstitch machine,
- list some of the best coverstitch machines you can purchase online,
- give you a brief explanation on how to use a coverstitch machine.
Coverstitch vs Serger
From what I wrote above, you may have gotten the impression that these two are similar in a way. And you wouldn’t be wrong. But certain differences shouldn’t be disregarded. Let’s look into that first.
Coverstitch vs Serger: Key Differences
Most professional sewists like to have all three: a sewing machine, a serger, and a coverstitch machine. However, not all sewists are professional sewists who find investing in three different devices profitable.
That’s why I suggest you read through these key differences and determine which one suits you better. After that, I will list all the similarities, just to make sure that you understand the things that both machines can do (and whether you need either).
- A serger primarily serves the purpose of serging and trimming the fabric edges. This is the most important operation of the serger, and it’s much faster to perform this with a serger compared to coverstich machine.
- You can use the coverstitch machine for everyday sewing just like a regular sewing machine; however, it has the additional ability to make a double stitching line to provide hems with a stylish and visible finish line.
- One of the advantages of a coverstitch is that it has a larger working area. Serger producers figured out that this could be an excellent addition, so some of the latest models of sergers now include extended work surfaces.
- A serger has less space between the machine housing and the right-hand needle than the coverstitch.
- A serger has the advantage of having two loopers to thread, while the coverstitch has only one.
- A serger usually has two knives that trim uneven fabric edges. This happens as you stitch. This is not a feature of a coverstitch machine.
- The coverstitch machine has three needles, which can often be a considerable advantage in making nice stitches. A serger usually has two needles, though some of the latest models have an option for adding one or even two needles.
Coverstitch vs Serger: Key Similarities
Now that we’ve discussed the most important differences between the coverstitch machine and a serger, I will give you a brief explanation about their similarities, as this might help you form your decision on which one you would like to buy.
- They both include a differential feed you can adjust using a control dial.
- The needles used are usually universal and can be used on home sewing machines.
- Both work best with strong and fine threads, as well as slick and smooth surfaces.
- They both include an arm feature that is free and makes it easier to work on sleeves and tiny areas and a presser foot that can accommodate multiple layers of fabric or just very thick material.
Best Coverstitch Machines to Buy Online
Now that you’ve learned what a coverstitch machine is and how it differs from a serger, I will list some of the best coverstich machines I have worked with so far.
Brother 2340 CV Coverstitch Machine
This machine comes at a very affordable price, and the frame is made of metal so that you can expect satisfying durability. It allows you to create multiple types of stitches, and it weighs only one pound, so it’s suitable for traveling and moving around the working area.
Juki MC 1500
Juki MC 500 is well known even among professional sewists. It’s great for knitted fabrics and works well for various purposes such as making cuffs, plain, and hem necklines. It’s suitable for stretch fabrics as its seam can be extended.
The presser foot is larger, making it easier to insert the fabric at the beginning of sewing. Furthermore, you can adjust the differential for sewing different kinds of finishes, regardless of whether you’re working with stretch fabrics or not.
The price of this machine is somewhat higher, but the output it provides is worth the additional bucks.
Bernette B42 Funlock
Price-wise this one is somewhere in the middle between the previous two, and it comes with 3 types of covers of 0.11 and 0.22 mm of width and a chain stitch. It gives your cuffs, hems, and edges professionally-looking stitches, and you can use it with a variety of fabrics, guaranteed without damaging the fabric.
Other features of this machine are easy threading, as it has a separate needle threader and a mechanism for loop threading.
The machine is illuminated and equipped with bright LED lights to give you a nice overview of what you’re doing.
How to Hem on a Coverstitch Machine?
Finally, in this section, I will provide you with a brief tutorial on how to hem on a coverstitch machine to get a grasp of what it means to work with this type of machine.
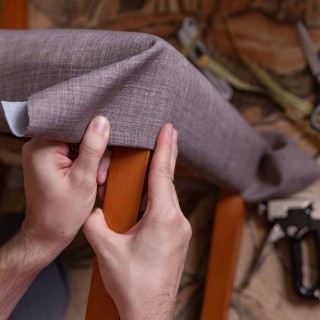
Step 1: Preparation
As usual, you need to do the preparation properly. Start by evenly cutting the edges, preferably with a rotary cutter, as that’s the best way to achieve even edges.
Step 2: Fold the Hem
If the material is heat-friendly, you can iron your fold a bit to make the hemming smoother. You can use some clips or pins to keep the fold in the right place.
Step 3: Sewing
The sewing should start at the backside, right after the seam that is on the side. Pull back all of the threads and then to the left so that they are not snagged once you start to sew.
If the coverstitch machine doesn’t have a built-in ruler, you can use a seam guide to make the hem even.
Step 4: Finishing
The beginning stitches should be sewn over for an inch or less, and then you can release the tension by lifting the presser foot.
The machine manual should contain the specifics for releasing the tension and threads.
Finish your seam by securing it properly, as otherwise, these may unravel. You can do it by pulling the thread and clipping the thread loop in the middle. Then, you can pinch the fabric by grabbing it from behind the presser foot and pinching the seam firmly. Finally, pull the fabric back and then to the left. And, you’re done.
Final Word
If you plan to have many sewing projects, especially if you like to sew human, animal, and doll clothing, I strongly recommend purchasing a coverstitch machine. It gives your finishing stitches a very stylish and professional look you will be proud to wear anywhere.For more tutorials and info articles on sewing and sewing products, follow my website’s how-to and review pages.
Last update on 2025-07-07 / Affiliate links / Images from Amazon Product Advertising API