Summer’s the perfect time of the year to start prepping for the chilly autumn and cold winter days ahead. An infinity scarf can protect your neck from harsh winds and low temperatures while spicing up your casual and semi-formal outfits. Although there are many beautiful infinity scarves available in both physical and online accessory stores, learning how to sew one yourself is smart because you’ll be able to pick the fabric and save a few bucks. Read on to find out how to make an infinity scarf step by step.
P.S. This project is suitable for both beginners and experienced sewers.
Step #1: Gather Your Supplies
To be able to sew a proper infinity scarf, you’ll need 2 yards of fabric (the width should be at least 55 inches), fabric shears, a measuring tape or a ruler, matching thread, pins or clips, a needle for hand-stitching, and, of course, a sewing machine.
When it comes to fabrics, jersey knit is the safest choice here because it’s stretchy and has a really nice drape. Aside from jersey knit, cotton, flannel, and minky are three more amazing types of fabric that can work well here. Pick one that can easily complement your personal style.
Step #2: Prepare the Fabric
Before you begin cutting and sewing your fabric, you need to launder, dry, and press it. Don’t overlook this step because your fabric might shrink or otherwise change during washing. This needs to be done before the cutting and sewing parts of the process to avoid ending up with an ill-fitting scarf.
Step #3: Cut the Fabric
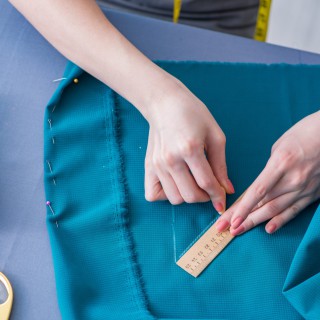
Start by folding your fabric in half lengthwise (horizontally). Make sure the sides are completely aligned. After that, cut down the fold. Depending on the width you opted for in step 1, you’ll have two strips of fabric that are at least 27½ inches wide. The wider the piece of fabric you’ll work with, the fuller your infinity scarf will look. You’ll need only one of the strips to sew a single infinity scarf. You can use the other one to make an infinity scarf for your best friend or a family member, or incorporate it into some other project.
Step #4: Fold and Pin
It’s now time to fold one of the fabric strips you cut in the previous step in half lengthwise. Make sure the right sides are facing one another. Then, secure the raw edges in place with pins or clips.
Step #5: Sew the Raw Edges Together
Get behind your sewing machine and sew along the raw edges of your fabric. If you decide to work with a stretchy fabric, it’s best to apply a zigzag stitch. Straight stitches are a good choice for cotton prints. Don’t forget to backstitch both at the start and at the end of the stitch to secure it. Remove the pins or clips as you sew.
Step #6: Turn the Stitched Tube Inside Out
Once you finish stitching, adjust the tube so the seam faces up and stick your arm all the way through. Then, grasp the seam at the bottom and pull it back through until the ends meet. The seams need to be aligned here.
Step #7: Pin and Sew
What you need to do here is pin the right sides of the fabric together all the way around the tube’s edge. After that, sew around the tube, securing the beginning of the stitch by backstitching it. The key part here is to stop sewing when you are around 3 inches away from the place you started. This is how you’ll create an opening needed for the next step.
Step #8: Flip the Scarf Inside Out
It’s now time to grab some of the fabric through the opening and pull it out. This can be a bit tricky, so be careful and have patience. You’re almost there!
Step #9: Close the Opening
With a hand-sewing needle and matching thread, stitch the hole closed. Since your infinity scarf will be quite a visible part of your outfits, it’s smart to apply an invisible or hidden stitch. Don’t worry, it isn’t very complicated.
First, thread your needle and tie a knot at the end. Then, work the needle up through one of the opening’s edges. Next, go to the opposite side and press the edge to form a fold. Slide the needle through the top of the fold to pick up a little bit of fabric. Continue by going straight across to the other edge and repeat the process. If you do things right, the stitches will look like ladder rungs and will disappear when you pull the thread taut. Hand-stitch the entire opening pulling the thread taut every few stitches.
Finish the stitch by picking up a little bit of fabric and bringing the needle through a loop of thread to make a knot. Repeat this for added security. Lastly, pull the needle down through the knot and out the side of your scarf, and then cut the thread to hide its tail. That’s it! You just learned how to make an infinity scarf!
Bonus Info: How to Wear an Infinity Scarf
Now that you know how to sew an infinity scarf, you might be wondering how you can wear this popular accessory. Well, the great news is that there are many amazing ways to do it. I, personally, am a fan of the knot and the double loop, but the tie, the turtleneck, the bow, and the shawl are gorgeous styles, too. Here’s how you can create each of them:
The Knot
This is one of the classiest ways to wear an infinity scarf. You need to first put the scarf around your neck as is (one loop) and then make a knot towards its bottom. This style will jazz up practically every minimalist outfit. Pair it with a sleek black dress and a nice cardigan and witness the birth of an effortlessly chic ensemble.
The Double Loop
The double loop is ideal for informal occasions. This cool style can be created very easily and quickly. Start by inserting your head through your infinity scarf, then create a figure 8 in front of your body by crossing the scarf (make sure the cross is directly in front of your neck), and then pull the lower loop of the 8 over your head. Finally, adjust and fluff out the loops to create the desired fullness.
The Tie
The tie is another sophisticated style. To create it, grasp both ends of your scarf, wrap it around your neck, and loop one of the ends all the way through the other. For a fun twist, wear your infinity scarf to the side instead of at the center.
The Turtleneck
The turtleneck is very similar to the double knot. The key difference between these styles is that the turtleneck requires you to pull down one of the loops so the other one hugs your neck tightly (but not too tight; you don’t want to have trouble breathing).
The Bow
To tie your infinity scarf like a bow, you need to first fold it in half around your neck. Then, you can make a bow and move the scarf to the side. This is such a fun and playful way to wear this versatile accessory.
The Shawl
You can wear your infinity scarf as a shawl as well. First, you need to slip one of your arms through the scarf making sure the top hugs the respective shoulder. Then, you need to move the scarf around your back and slip your ‘free’ arm into the opening. It’s now time to check if the opposite end hugs the other shoulder. Lastly, adjust the scarf so your shoulders are covered by an equal amount of fabric. Be sure the part of your infinity scarf that covers your upper back is flat and snug.
If these styles are a bit too much for your liking, feel free to use the single loop. Just pull the scarf over your head, let it hang down your body, and hide the seams for a more polished look. Child’s play, right?
Final Words
As you may have noticed, infinity scarves have taken the fashion world by storm. However, these must-have accessories tend to cost a lot. That’s exactly why learning how to sew an infinity scarf should be at the top of your to-do list.
If you’re new to sewing and/or fear that you haven’t honed your skills enough yet, practice making an infinity scarf with an old stretchy t-shirt or dress. Feel free to change the measurements if your old garments aren’t large enough to apply the above-mentioned length and width. You don’t have to knock it out of the park this time; you just need to understand the process. You’ve got this!


