Maybe you’re a newbie on the sewing machine, or an experienced sewer looking for a better strategy to thread a needle on a sewing machine.
Many sewing machines have mechanisms to do this automatically, but maybe you have a retro machine that requires hand threading, or you want to thread a twin needle, which needs to be hand threaded.
Lucky for you, my grandma who taught me how to sew always insisted that I need know how to do this by hand. That’s why today I have several aces up my sleeve that might help you thread your needle on a sewing machine with more ease either with your hand or with a threading tool.
In this article, I’ll share with you steps, techniques, and methods to thread a needle on a sewing machine.
Tips to Begin With
Threading the needle requires great precision, so it’s very important that your vision is good. If you can’t focus on the eye of the needle, make sure that you have your glasses or lenses on.
Once you are ready to start, here are some things to pay attention to at first.
Turn Off the Machine
Beginner sewers should always turn off the machine before threading for safety reasons. You’ll need to turn it on to raise the needle up if the machine doesn’t have a hand adjuster, but once you’ve done that, switch it off as you might start the machine while threading and injure yourself.
This means you’ll lose the light necessary to complete this action. That means you should provide alternative light sources before you begin and orient the machine against the source of light to you avoid any shadows.
Experienced sewers can work with the machine turned on, especially if they own a high-end sewing machine that require to be turned on while threading a needle.
Improve Visibility With a White Background
A simple piece of white paper can help you see the eye of the needle with greater precision due to the created contrast.
Since the needle is dark, it will be much easier to observe it and find the eye if it’s positioned against a bright background.
Consider Removing or Lowering the Presser Foot
While this is an optional step, for those of you having larger fingers, or generally having trouble reaching the eye of the needle, it might be best to remove or lower the presser foot once you’re done with the upper thread.
This can be completed by snapping the foot off or pressing the lever. If you’re not sure how to do this, but still have the user manual, consult it before removing it yourself.
Place the Needle Up
The best way to thread the needle on a sewing machine is to keep in the up position. If you have an automatic machine, just press the button that says “needle up.”
If your machine is manual, you’ll need to use the handwheel or the foot pedal to turn the needle up.
Automatic needle threaders only work when the needle is up anyway, so you won’t be able to do it until it’s flipped on the side.
The Direction of the Thread
The direction of the thread should always be from the front to the back of the needle. The thread should remain untwisted as it passes through the needle’s eye.
The eye of the needle is that little hole on top of the needle. To thread the needle you need to use the thread that goes on the top of your sewing machine (instead of the bobbin thread).
When the thread is through the eye, you need to bring it behind and beneath the presser foot.
Cut off Frayed Thread Ends
Passing a frayed thread end through the eye of a needle is an impossible task. Do yourself a favor and make your thread strong and slick before even trying to pass it through.
To complete this, use sharp sewing scissors because dull scissors can actually worsen the situation.
Experienced sewers know this, but beginners might not, you should always cut the thread at a slight angle to make it stronger.
Lick the End of the Thread (Optional)
This may sound gross to some, but this is how the folks used to it in the old times (and many still do).
Before passing the thread through the eye, you can lick it a little bit and then swish with your fingers to make it stronger. Water should also work.
Sometimes threads get limp and a little bit of fluid can make things work.
If you are disgusted by this idea, you can also try using Thread Magic, which is available on Amazon. It’s an amazing product with many purposes. It reduces thread fraying, strengthens it, and makes it easier for the thread to pass through the needle eye.
How to Thread a Sewing Machine Needle – Techniques and Methods
Now that you’ve prepared your machine, needle, and thread, it’s time to actually thread the needle on the machine!
Here are some of the techniques I’m familiar with.
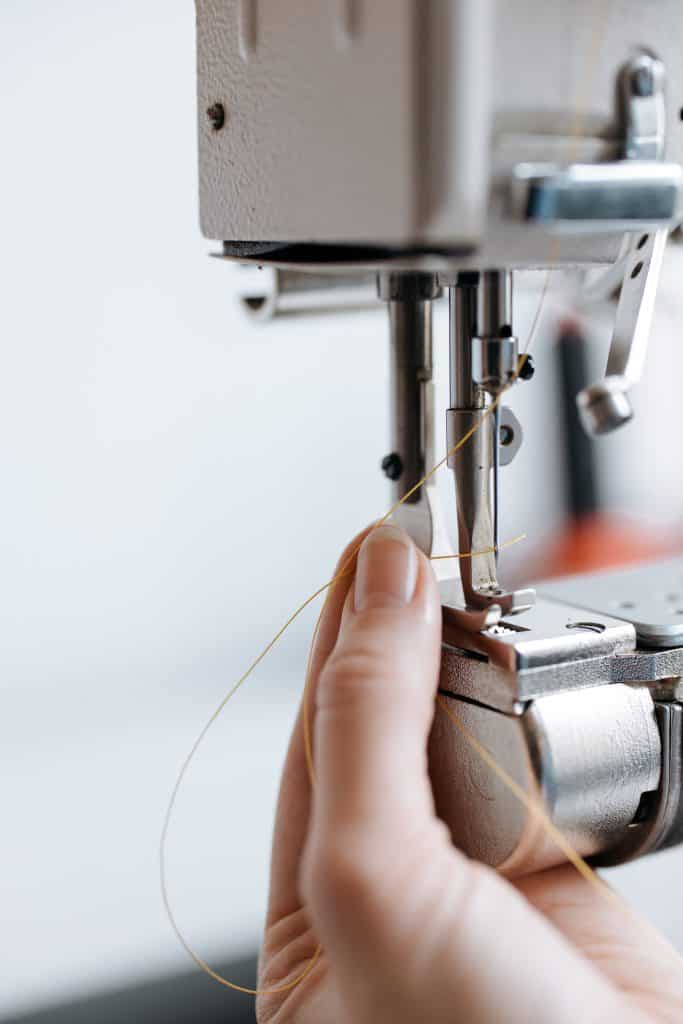
Thread a Needle by Hand
This is the most “raw” method for threading a needle. Although the steps sound simple, it can be frustratingly difficult to complete if you don’t have good vision, hand precision, or you’re handling a very small needle.
Take the thread some ½ inch from the end and carefully push it through the needle’s eye.
That’s it.
If it’s not working out well, go back to the preparation steps above, and see if you can add more light, use white paper, take off the presser foot, or make the thread wet.
Thread a Needle With a Threading Tool
If hand threading doesn’t work out for you, you can use one of many threading tools to help you out with the process.
Many needle threaders require approaching the needle from the backside, which can be a bit tricky. That’s why you can search for threaders that approach the needle from the front side.
Here are some good needle threaders that I’ve used that have given me good results.
- Dritz needle inserter and threader
- Singer plastic needle threaders
- Bohin sewing machine needle threader
- Dirty Serger needle threader
Self Threading Needles
Finally, if there’s no way for you to thread the needle by yourself, you can purchase self-threading needles for the sewing machine. Luckily, you can find these too on Amazon.
Some of the self-threading needles I would recommend are:
These needles have small slits where you can slip the thread easily rather than trying to hit the needle eye.
Although this can make your life easier needle threading-wise, these needles have their downsides. For example, they only come in limited sizes and types. This means that you can only use them for certain types of fabrics. Then, the slits on these needles are not as secure as the needle eye, so the thread can slip out.
The Automatic Threader
Some machines have automatic threaders built-in, so you needn’t go through all the struggle. But, this comes with a price – these automatic threaders tend to bend and it’s not very easy to fix them.
However, here’s how to thread your needle with an automatic threader.
First, you’ll find a small lever on the left side of the machine. Hold and pull this lever and it will rotate the threader through the needle’s eye.
On the inside of the threader, you will also find a small hook designed to catch your thread as it runs along. The hook will pull the thread back to its normal position once the threader is rotated back through the needle’s eye.
Conclusion
Although the steps are simple, threading a needle is a lot harder than it seems. There are many ways to do it, from hand threading to using tools or having a machine that can do this automatically. All the ways are possible to master, and each of them has its complications.
With some good preparation and practice, you will master the skill of needle threading on a sewing machine in no time!
Last update on 2025-07-09 / Affiliate links / Images from Amazon Product Advertising API