As you probably already know, a monogram is a motif consisting of two or more letters, usually a person’s initials. When done right, monogramming is one of the classiest ways to personalize your garments, accessories, robes, towels, linens, and other possessions. You can put your initials on your favorite shirt, sweatshirt, backpack, or handkerchief using a number of different methods, but monogramming with a quality embroidery machine is without a doubt the most popular option. In this article, I’ll introduce you to three different ways of adding monograms to items, either for yourself or as gifts. Read on to familiarize yourself with each of them and find out which one suits you best.
Method 1: How to Monogram With an Embroidery Machine
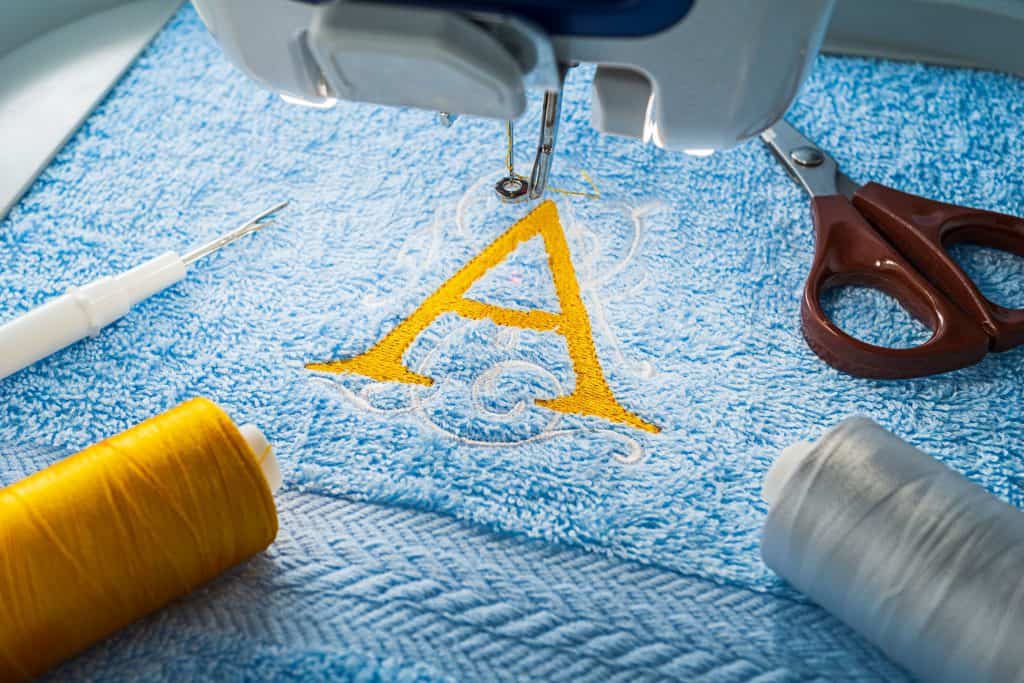
Monogramming with an embroidery machine is easier than you might think. If you own a nice embroidery machine and know how to use it, this is definitely the perfect method for you. Here’s what you need to do:
Step #1: Choose a Monogram Type
Before you get behind your embroidery machine, you need to decide on the letters that will make up your monogram, the order they’ll be in, and, of course, the size.
If you love traditions and want to honor them every chance you get, start with your first name initial, end with your middle name initial, and put your last name initial right in the center. The last name initial needs to be larger than the other two. A good rule of thumb is to make the side letters about 20% smaller than the center one. So, for example, if you are a fan of P!nk and want to monogram a t-shirt for her, you’ll need to add an ‘AMB’ to the fabric (P!nk’s full name is Alecia Beth Moore).
In case you want to keep things simple, go with the two-letter monogram. As the name suggests, use only your first and last name initials in that order and apply the same font size for both letters.
Step #2: Set up a Monogram Embroidery Design
The easiest and most convenient way to complete this step is to utilize your embroidery machine’s built-in lettering function. The process is pretty straightforward: create a monogram in your machine interface by selecting the letters you want to use. If you decided to go with a traditional monogram, it’s smart to start with your first name initial and end with your last name initial (the center letter). Adding the center letter last will make your last name initial more visible in case the letters overlap (this depends on the typeface you choose).
After you select all three letters, you’ll need to change their position and size individually. Let me remind you that the center letter needs to be visibly larger than the ones on the sides. The rest of the details, like the spacing and the thread color, are entirely up to you.
Step #3: Pick an Area on Your Item for the Monogram
It’s now time to decide where to place your monogram. If you’re going for a minimalist and subtle embroidery monogram, you might want to embroider your monogram close to a corner (if you’re adding a personal twist to towels, linens, handkerchiefs, and other similar items) or on your shirt cuffs. The most popular spot for monograms on t-shirts, blouses, hoodies, jackets, and other similar pieces of clothing is the left chest. To make the last two steps easier, draw a straight guideline for the letters using a temporary fabric marker like Madam Sew’s Chalk Fabric Marker.
Step #4: Position the Hoop of Your Embroidery Machine
To prepare for the embroidering part of the process, place the center of the hoop on the center of the area ‘reserved’ for the monogram. To avoid puckering and reduce the chance of mistakes in general, consider putting a stabilizer at the backside of the spot for your monogram. There are a few basic types of stabilizers you can choose from, including cut-away, tear-away, water-soluble, and fusible.
If you want to monogram an item made of stretchy knit fabric, place a sheet of cut-away stabilizer on the wrong side of the fabric. Tear-away stabilizers, on the other hand, are ideal for woven fabrics. Water-soluble stabilizers are commonly used with lightweight fabrics like tulle and chiffon. This stabilizer type can also be used on top of plush fabrics such as fleece and velvet to prevent the stitches from being pulled down into the fabric. Last but not least, fusible stabilizers are great for standard embroidery and are applied to the wrong side of the fabric with an iron before the stitching begins.
Step #5: Turn on Your Machine and Start Embroidering
You’re now ready to secure the hoop in place and press the start button on your embroidery machine. Once you do that, you’ll need to sit back and watch the magic happen. After your machine does its job, you’ll need to detach the hoop, trim the excess thread, and remove the stabilizer. That’s it—you did it!
Method 2: How to Embroider Monograms by Hand
If you don’t own an embroidery machine, you can add a monogram to an item of yours by hand. Be prepared to spend a lot of time on this project, though. As hand-embroidering a monogram is quite time-consuming, you’ll also need to have patience. Here are the steps you need to follow here:
Step #1: Design a Monogram
Start the process by creating a monogram design by drawing it by hand, or printing it from your computer. Just like with the previous method, you need to decide on a monogram type. Feel free to draw several different versions, i.e. choose several different fonts if you’re having a hard time picking a style. Comparing them might help. Whichever monogram type and font you go with, make sure the size of your monogram design is the exact same size you want to put on your item.
Step #2: Decide Where to Place the Monogram
Choose an area on the fabric that’s larger than the monogram design. There should be at least a couple of inches around the monogram so you can secure the embroidery hoop. Once you pick the spot for your monogram, transfer the design by tracing over it. To be able to do this, you’ll need a carbon paper between the fabric and the piece of paper containing the monogram design. For the best results, complete this step on a hard surface.
Step #3: Get to Embroidering
Congrats—you’re almost there! Embroidering by hand is, of course, the final step. First, fix and tighten the hoop around the monogram design on your item. Then, pick an embroidery floss and start stitching. You need to outline the initial using a split stitch before filling it with satin stitches. When the letter is complete, cut the excess thread and remove the hoop. Repeat this for each letter.
Method 3: How to Create Applique Monograms
This method is quite possibly the quickest and easiest way to add monograms to your personal items. Here’s how to create an applique monogram:
Step #1: Gather Your Supplies
For this method, you’ll need a piece of fabric for the letters and an iron-on adhesive to be able to apply the monogram on the item you want to jazz up. If you want to save yourself some time, buy an adhesive that doesn’t require sewing. You’ll also need a pen or pencil, a ruler, and a pair of sharp scissors.
Step #2: Determine the Size of Your Monogram
It’s now time to decide how big you want the monogram to be. You can do this by measuring the area where you want to add the letters.
Step #3: Cut the Fabric and Adhesive Sheet
Cut your fabric using the measurements you took in step 2. Then, take a single adhesive sheet and cut it down to the size of your fabric. Next, place the fusible, sticky side of the sheet on the back of your fabric. After that, set your iron to the medium heat setting with no steam. Once your iron is heated, place and hold it on the sheet for a couple of seconds. Do this as many times as needed to bond the entire surface. Once the fabric and sheet combo is cool, draw your monogram on the sheet making sure the letters are backwards and cut them out.
Step #4: Peel off the Adhesive Paper and Apply the Monogram
Begin by preheating the spot on your project where the monogram should go. Then, remove the adhesive paper from the letters, place them carefully, and iron them on. If you use a sewable, light-duty adhesive, you’ll need to stitch the applique monogram in place with your sewing machine. That’s pretty much it!
Final Words
Despite what some people think, monograms can be tasteful. The type, font, and size play an immensely important role here. Create a design that complements the item you want to monogram, but don’t go overboard. Good luck!
Last update on 2025-07-10 / Affiliate links / Images from Amazon Product Advertising API


