If you are part of a lively family with energetic kids, the days approaching Halloween turn out to be full of buzz and fuss.
An accurate summary of these days is as follows: kids are constantly bugging you about their costumes, and there is always someone whose screams emerge from the suburbs and reach the state lines: “Robert? Robert? Have you yet bought the treats? Robert? Robert? Are the pumpkins ready yet? Robert? BOB!”. Hopefully those screams are coming from your neighbor’s house, and not your own..
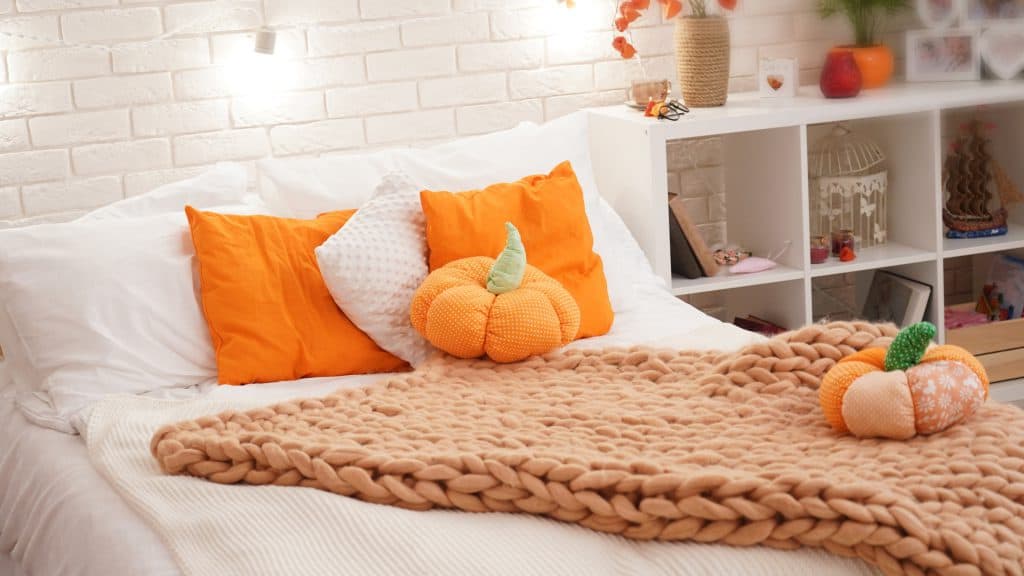
What if I tell you that there is a way to silence everyone, though, and make sure that Robert remains as non-essential as he’s always been? That way is giving certain tasks to everyone in the family, by getting them involved in DIY projects for their own Halloween costumes and for a one-of-a-kind collection of fabric Halloween pumpkins. Not only will this collection be unique to your household, but also you’ll be able to use the pumpkins as furnishing items even when it’s not Halloween season.
Now, let’s see in detail how you can make fabric pumpkins.
How to Make Fabric Pumpkins: A Step-by-Step DIY Guide
Step 1: Prepare the Material
As you are reading this post and unwittingly imagining pumpkins, it’s quite possible that you think you have to get orange fabric for this project, but you’d be awfully wrong. As with most other DIY sewing projects, you have the liberty to customize the look by choosing your own material, and you can choose whatever color, type, or design you want for your fabric. You want to have a witch riding a broom? You can have it. Your child wants to have Harry Potter on the pumpkin because they are going through a phase where everything has to be about Harry Potter? Rest assured, you can save the day and make a Harry Potter themed fabric pumpkin.
Other than fabric of your choice, you’ll need thread, sewing machine, needles and pins, (optionally) fabric fusion or a glue gun, scissors, a ruler or measuring tape, and a fabric pen.
You need some sort of filling for the inside, and to finish the project with aplomb, you need to put a nice-looking stem on top of your pumpkin as well. For that, you might use cork, a small piece of wood, or leftover fabric. If that sounds too basic for a stem, you can go wild with laces and whatnot, too.
Step 2: Cut the Fabric
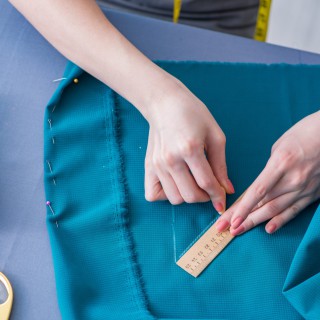
If you want your pumpkin to look realistic, the recommended lengths for the rectangle cut you’ll have are as follows: 8 inches by 16 inches. I am going to give instructions for these numbers, but following them is not obligatory whatsoever. You can go creative with the size and style.
Also, before cutting, you can either mark your cutting lines on the fabric with a fabric pen or chalk or you can create a pattern on paper and cut the fabric in line with that. Either way works, and you know what, when it comes to making fabric pumpkins, an accurate cutting is not all that important because there is no organic pumpkin that has a perfect symmetry in nature.
Step 3: Stitch the Fabric
Put the fabric with its right side facing you on a smooth surface, straighten it, and fold it from the short side. The aim of this step is creating a pouch that will later be filled by a batting of your choice. Therefore, you have to stitch only the two of the loose sides with a ¼ inch seam allowance.
Step 4: Stuff It
Remember, the fabric was facing right side up before you folded it? That means the pouch you ended up with is with its wrong side out. Therefore, you have to turn it inside out before stuffing it.
For stuffing, it’s best to use cotton, but anything that can be easily shaped is also okay. Cotton will only make it lighter and make it feel good when you are touching (or kicking) the pumpkin, but let’s hope it doesn’t come to that.
After you stuff it, you have to stitch around the open edge – mind that you are not closing it up, but sewing around so it curves inwards at the top like the top of a natural pumpkin where it’s stemmed.
Step 5: Create Ridges
Pumpkins are quite ridgy, and that’s, like, their signature look, and the most incomprehensible part of this project is how to create ridges for someone who knows nothing about sewing. However, that’s also the easiest part and the idea should come as natural as it gets for an experienced craftsperson like you. You use embroidery thread or floss to go around the stuffed fabric a couple of times and that’s it.
However, that’s not necessarily the most important part of this step. While doing that, you should also pull the thread (or floss) through the top of the pumpkin where its stem should be to create that organic curvature.
Step 6: Stitch Glue the Stem onto the Pumpkin
As I said earlier, you can use lots of things for making the stem so long as you know what a stem looks like – if you don’t, I’d refuse to help you, but Google unfortunately wouldn’t. Once you have a stem-like item in your hand, you can just glue it onto the fabric using either a fabric fusion or glue gun (or both of them together, just to be really, really sure).
If you want, you can also make a stem out of a cone shaped piece of fabric, like I have done in the examples above.
Having done that, you can take a step back and admire your pumpkin, you can take it to your veranda and carefully place it there so that all your inept neighbors get a nice view of it, or forget it where you sewed it so that your kids can play soccer with it while also breaking a few vases and other items in your living room. That is up to you – the important thing is, you have done it and you are a superstar.
Further Ideas for Making Fabric Pumpkins
There isn’t only one way of making a pumpkin – actually, you’d be amazed how creative you can get with this sewing project as my jaw was definitely dropped while looking at the tutorials of others. Here’s my four favorites:
- Velvet Pumpkin by Jann Newton – Velvet has a way to make everything classier than they should be and the end-product of this wonderful tutorial is another proof to that. Moreover, although the shape of the pumpkin in the end is not that realistic, one can’t help thinking: “Maybe, that’s how pumpkins should have looked like in the first place”. Also, the stem is looking too good even on its own. The tutorial lasts for only eight minutes, so you can be sure that it’s quite easy too.
- Velvet Pumpkin by Abbi Kirsten Gillespie – I said that the velvet pumpkin above is classy. Well, then, this is otherworldly. This pumpkin is what it would look like if Jennifer Anniston decided to turn herself into a pumpkin drawing inspiration from Rick Sanchez’s pickle. This is a pumpkin that can only be bred in a just and equal society. This is a pumpkin that will be the only surviving element in the event of an apocalypse.
- Pumpkins Made of Used Fabric by HGTV – Jennifer Anniston turning herself into a pumpkin is not an appealing idea for you? Then, you can sew a pumpkin using an obsolete piece of clothing like a leather jacket that hasn’t been worn for decades, thanks to this very easy tutorial by HGTV.
- Polka Dot Pumpkin by Ageberry – The first three recommendations I have made are easy sewing projects. This one, on the other hand, is for those who possess an embroidery machine and have relatively advanced skills. However, the pumpkin you’ll have in the end is so exclusive that it will be worth the effort you put into the project and the price you paid for your embroidery machine.
Final Words
I gave you an easy and brief guide for making fabric pumpkins as a testament for how effortless it could be. Then, I supplemented that with more creative and complicated tutorials that you can find online as a testament for how classy pumpkins can be – not only as Halloween decoration but also for home furnishing.
Thanks to those, you should by now have a pretty good idea what you could expect from this sewing project, and I believe you might even better those ideas with your unique choices for fabric, stem, and design. I was surely surprised when I realized how much artistic/expressive freedom you have while making fabric pumpkins, and I am sure you will make the most of it.
Last update on 2025-07-10 / Affiliate links / Images from Amazon Product Advertising API

