Do you have a habit of listening to Phoebe Bridgers alone on your veranda (or balcony) during cold nights? Are you one of those sensible people who prefer to sit outside while you are having coffee or a drink no matter how cold it is? Do you want to look hip without getting your head cold?
If your answer is yes to any of these questions, then you need a beanie.
A beanie hat will keep your head warm while giving you a casual yet contemporary look with its slouchiness, and when you are feeling down, it’ll just be the ultimate complement to your depression outfit.
It’s even better when the beanie you wear is one that you made yourself. Even if you are in the most secluded forest cabin, you can be sure that Phoebe Bridgers divines your and your sewn beanie’s existence and that she is proud of you in her silent storm.
Without further ado, let’s see how you can achieve that and how easy it is.
How to Make a Beanie: A Step-by-Step Guide
Step 1: Create a Pattern
For more complicated sewing projects, I would recommend you find a pattern online or provide you with one myself, but sewing a beanie is not a complicated project at all, and you can easily draw your own pattern, so long as you have you have a pencil, measure, geometric compass and ruler at your disposal.
A beanie hat consists of two identical pieces, so just a piece of paper will suffice for your pattern. Measure your head circumference, decide how long you want your beanie hat to be, and cut the paper equal to the circumference on one side and a couple inches longer in terms of length.
Then, you have to fold it in half to acquire the patterns for two identical pieces. Place it folded and vertical, make two circular lines that start from each top corner and finish right at the middle of the other side of the paper by using your geometric compass. If you cut the paper in accordance with those circular lines as the paper is still folded, you’ll have patterns for each piece of the beanie hat, and you can unfold the paper.
Step 2: Prepare Your Sewing Tools
Of course you can go on and pick whatever kind of fabric you want for your beanie and I cannot stop you or question your decisions once the end-product is comfortably sitting on the top of your head like an exotic bird eyeing the tropical forest, but the best option for this project is stretch fabric like jersey. In addition to a sewing machine (or sewing needles), you’ll also need thread in matching color(s) to the fabric and scissors or fabric cutters.
Step 3: Cut the Fabric
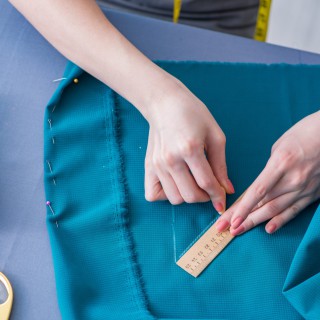
Before cutting, you have to fold the fabric in two as well and place the pattern on it in a way that the folded edge of the fabric will line up with one side of the pattern. Then, using either scissors or a rotary cutter, cut the fabric in line with the pattern.
Once it’s cut, you should have four two-dimensional beanie shapes side by side on your fabric. You should just fold it in half, too, so that you end up with two beanie shapes instead of four.
Step 4: Start Stitching the Beanie
For stitching beanies, I’d recommend using serger machines although it’s not a must. If you don’t have one or if you don’t have the means to purchase one just to sew a beanie, it’s alright – you can use your sewing machine or your hands for making some tight zig zag stitches. As the beanie doesn’t require as many stitches as, say, a blanket, it shouldn’t be that much of a problem in the end.
Now, at the end of the third step, you should be looking at a loose long edge affixed by pins. Our first stitching should be applied to that long edge. Then, we need to decide which narrow loose edge (peak, if you like) should be its top, and stitch it as well.
Step 5: Turn It Inside Out
So far, we have been working on on the wrong side of the fabric. To finish it and make it wearable, you need to turn it inside out and fold the edges of the opening as much as you like to have a proper hat.
And, congratulations, you are done!
Step 6: Research!
Okay, this is not necessarily a step for making a beanie because the guide I provided above is just enough to end up with a decent result, but there is not only one way to make a beanie, and the one I accounted for above is just how I prefer doing it. It might seem difficult or complicated for you – and you might have more ease going with different processes.
Luckily, there are many great tutorials online, all of which are easy and could be more appealing for beginners than text-only instructions. Therefore, before getting to work, conduct your own research and decide on a method for your own project.
Final Words
To be honest, making a beanie is one of the easiest projects you can undertake, and with the right type and design of fabric, you might end up taking a huge leap for the impressions you make when it comes to being fashionable. In an hour or about, you might possess a beanie hat that you didn’t know you needed to complement your winter outfit and that could help you attend a Pitchfork festival or Sasquatch without a ticket.
In addition to that undeniable positive, it may also keep your head warm – even warmer than those you can buy from a store if you pick of the right materials. The praises you’ll get for your skills or appreciations for your aesthetic choices will just be the cherry on top.


