One of the things that makes a space feel like home is a blanket on a couch.
Although the functionality of the blanket is its most important feature, we all want our blankets to also look good, especially if you plan on posting pictures of yourself wrapped in your cold-days-masterpiece.
This means that you should choose a well-designed fabric that is comfortable and gentle on your skin, and that can at the same time keep you warm.
Although many people think that sewing blankets is a daunting job, they’re actually very easy to make. They require little to no sewing knowledge!
In this article, I will teach you everything I know about sewing double-sided blankets that will not only keep you warm during the cold winter months but will also look amazing.
Sewing a Double-Sided Blanket
For every sewing project, you need to get certain supplies and prepare your fabric for sewing.
Supplies and Preparation
- Sewing machine;
- Blanket fabric (it’s recommended to use 2 different fabrics with complementary colors). For a baby’s blanket, you’ll need approximately 2 yards, for a child’s 3 yards, and for an adult blanket you’ll need at least 4 yards of fabric.
- Thread (polyester is good in this case);
- Sharp scissors/rotary cutter/cutting machine – whatever works best for you;
- Pins;
- Measuring tape;
- Marking tool (chalk, pencil, or marker).
Before you start sewing your blanket it’s recommended that you pre-wash the fabric. All material can shrink when you wash it, so it’s for the best that you pre-wash it and prevent any deformation or shrinking from occurring after you’ve made your blanket.
Step-by-Step Double-Sided Blanket Sewing Guide
If your supplies and fabric are ready, it’s time to begin the sewing project. First step:
Cutting the Fabric
How big your blanket will be, depends on two things:
- How much fabric do you have?
- For whom the blanket is for?
Here are some of the standard blanket dimensions that might come in handy to you:
- A baby blanket suitable for the crib is usually 60×45 inches large.
- For a twin bed, the size is usually 90×66 inches.
- A double bed blanket size is 90×85 inches.
- The queen bed usually needs a 90×90 inches big blanket.
- Finally, for the king bed, it’s best if you create a 100×108 inches extra large blanket.
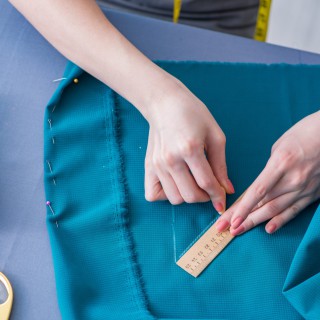
Now, cut two pieces of fabric to be equal (pick one of the suggested dimensions or adjust to your preferences). To achieve the best look for your blanket, it’s best if you use two different material types with complementary color combinations.
Then, place the two pieces together and pin them together. You can use safety pins or simple needle pins – whatever works best for you.
Optional Step: Making the Corners Round
Making corners round will make your blanket look more like it was professionally sewn, however, you might prefer your corners straight, so it’s your choice. Corners are a simple matter of aesthetics, there are no rights or wrongs.
For rounded corners you’ll need a curvy object from your home, it can be a plate, a bowl, or something else. Set this object in on the corner of the fabric and mark a line alongside the curvy shape of the object on your fabric.
Then, use scissors or even better, the rotary cutter to cut along that line.
Do this for all 4 corners.
Sew the Layers Together
Now, place the right sides of the fabrics so they face each other (aka the wrong sides facing out). Start sewing from the middle of one side. As you sew the two layers, make sure to make backstitches to make your stitches firmer. Sew the layers together around the sides leaving a half-an-inch seam allowance.
The next step is to take another turn sewing slowly around the fabric. As you go on, remove any pins and clips you may have added during the preparation process.
Pay special attention to the corners of the fabric while sewing, and also, try to be as consistent as possible with the seam allowance.
When you get to approximately 5-10 inches from the stitching starting point, stop stitching and make a backstitch. This is necessary so that you could turn the sewn fabric inside out. If the blanket is very large, you can leave an even bigger hole, so your fabric doesn’t get stuck during flipping.
If you’re unsure how big a hole to leave, the general recommendation is to make it ¼ of the length of the longer side of the blanket.
Get Rid of the Seam Allowance
When you’re done stitching, sewing, and turning your garment inside out, it’s time to work on style details.
For that, you’ll need to go back to the sewing table and use the rotary cutter or a pair of sharp scissors to cut the seam allowance as close as you can to the seam.
Once you do that, you may notice that the corners of your blanket are a bit swollen at the edges. You should press them using an iron.
Then, make a diagonal cut on the corners for a more stylish look and iron the blanket once again to make it smoother.
Flip the Blanket Inside Out
Finally, it’s time to flip your blanket inside out.
Do this through the hole you left two steps ago. If you want your corners to look round, make sure to get the seam right into the fold by adjusting it with your fingers. For square ones you can help yourself with a point turner that will help you keep the square in place and the blanket laying flat.
When flipping the blanket inside out make sure that all of your corners are properly pushed and tucked in so they have a sharp look.
Once you’re done doing this, give it another pass with an iron to make the blanket flat. Also, you can fold the unsewn hole so that the iron can press it properly.
Sew the Hole
Finally, it’s time to completely sew your blanket. Start by tucking in the seam allowance in the gap.
Then, use the pins to secure the edges and properly align them. If your stitches are not orderly aligned, it will be visible.
Once you’re sure that everything is neatly set up, topstitch your blanket along all sides. Leave half-an-inch seam allowance and close the gap. When closing the gap, first invert the seam that’s about to be hemmed and hold it with a pin.
Blanket Decoration
Finally, your blanket is done, and it’s time to have some fun with it: decoration time!
There are many ways you can decorate your blanket and make it stylish and pretty.
Trim Your Edges With a Serger
A serger is a tool for trimming and enclosing the seam allowances and gives your blanket edges a nice and orderly look.
Apply Decorative Stitches
If your sewing machine is more modern, it probably has a mode for making some decorative stitches. If you’re familiar with the option, simply pick your favorite decorative stitch and apply it to your blanket.
Do Some Hand Stitching
If you don’t have the decorative stitches option on your machine, you can try making them by hand, or simply apply some cross stitches.
Tape Ribbons
If you’re into making a quite fabulous blanket, consider taping some ribbons to its edges. These can be made of different materials, but my favorite is definitely satin.
If you used single-colored fabric for your blanket, ribbons of different colors could revive the blanket.
Add Some Embroidery
If you ask me, embroidery gives by far the best look to a blanket. If you know how to do it yourself, you’ll have a lot of fun giving life to your blanket, but if you don’t know how, you can also just take it to an embroidery shop.
Pro Advice: Types of Stitches to Use on Your Blanket
Although you will probably decorate your blanket in the end and make it look amazing, you can also use different types of stitches as you sew the blanket.
For example, you can sew along the edge in a single layer, or in a double layer. Or, you can sew in from the edge, or just sew corners.
Conclusion
That’s all from me! Now you have everything you need to make your ideal blanket for snuggling and staying warm during the winter season.
Although it seems like there are many steps to take in making your blanket, trust me, it’s quite simple.
Just stay focused and follow this tutorial precisely, step-by-step, and I bet that the outcome will be satisfying.
Even if the blanket is not perfect, it is still your snuggle blanket, and I’m sure you’ll make great use of it.
Enjoy!


